Showing posts with label Cuttlebug. Show all posts

28 January 2012

Moxie Fab World Embossing and Debossing Challenge

This Moxie Fab World Challenge is Embossing and Debossing.

So out came the cuttlebug embossing plates and i set to work!
Here is my card.


I used a dot embossing folder to emboss the card, and a postage heart stamp embossing folder. I embossed several different card colours and then cut out bits of each to give the different colours. i then added stickles into the word love and finished off with some twine and some bling.

If you would like to have a go on this challenge click the above link before the 13th feb.

Tara:)

23 October 2011

Paper Smooches SPARKS challenge....

I have jsut brought my first set of Paper Smooches stamps last week. they were so cute.
Here they are...
They are called chubby chums.The owl really reminded me of Hoot from Poppy's favourite show giggle and Hoot.

Don't you think so too? I am so going to colour the owl in just like hoot for some cards in the future!

So when i went on their site i saw they has a Challenge Blog too.

So i thought i would enter this weeks challenge.
Here is the photo for inspiration.....

And you can find the challenge here.
I am not a big fan of masculine cards but i gave it a go. Here is what i came up with.......


I have used the Chubby Chums stamp set. I have also used Lawn Fawn Jessie's ABC's, Sizzix embossing folder-woodgrain, MFT dienamics branch and leaves, copics to colour and several distress inks by tim holtz. The photo bit i made on my pc and printed and cut out to give the polaroid effect.

Tara :)

22 October 2011

Fisk-a-teers sketch challenge for a card.

I finally finished the card challenge for fisk-a-teers. WHEW! getting a few projects done all at once is hard work!
here is the sketch for the card.

and here is the card.....

I have used my circle shape template and shape express for this card and  my circle everywhere punch to make the window that the little red back spider hangs. I have used an embossing folder for the web and a tim holtz web stamp too.
Tara :)

09 September 2011

Lawnscaping challenge #17- embossing....

Hello there!, Today i want to share with you all the  lawnscaping challenge #17 embossing.

I needed to create an embossed card, now it can be dry or heat embossing ,so i decided to do both!

first i needed to create my own embossing folder. i stamped 2 of the lawn fawn snowman's from the new set called making frosty friends on to some box board.
Then i cut them out and stuck the cut outs where the holes were but on the other card at the back. creating my folder.

And there is my embossing folder.

I then embossed my card with the snowman and popped on their faces. added arms and buttons. I masked some trees from lawn fawns critters in the forest and coloured in.
To create the sky i heat embossed with white embossing powder snowflakes from lawn fawns making frosty friends,and critters in the snow. Then i used distress inks to blend a fading night sky.
lastly ii coloured and cut out the snowmans hat and scarf, added some texture by putting colourless blender on to some knitted wool and pressed on the copic colours i had coloured in with. added the bunny and robin then dry embossed with my cuttlebug the "snow" with dots ripped it and layered to make the snow at the bottom of the card. added some distress stickles in picket fence on the trees and snow and done!
Here is the card.

and here is a close up of the embossed snowman with my home made embossing folder

I hope you like it and even give making your own embossing folders a go!
Tara :)

17 July 2011

A card a day - day 17

With today's card i have stamped and coloured with pencils to give a more pastel look on my card. I have also used Cuttlebug to emboss the card and used my Fiskars fingertip knife to cut out the stamped image to give a 3D effect. The stamp is Stampin up from a few years ago i  think it is retired now.

07 June 2011

Tuesday Tutorial... Using Fiskars Everywhere punch to create a window.

Today for Tuesday Tutorial I am showing you all how the New Fiskars Everywhere Punch works and how to line it up to create a fantastic Window card.
Here is the finished card.
To create this card you will need the following.....
Fiskars Everywhere punch starter set. They are currently available at Spotlight or www.abiscraft.com.au
Fiskars Trimmer
Fiskars Scissors
Card-stock in brown and white (if using copic markers to colour use bleed proof card-stock)
Sizzix texture plate in brick pattern and a die cutting machine to run it through
Lawn fawn stamps. I have used critters in the burbs,critters in the forest,banneriffic, lunar lights,critters in the snow and fanciful frames.you can get them from www.lawnfawn.com (yes! I am loving lawn fawn at the moment!)
Copic markers to colour
memento tuxedo black in pad.
glue,glitter and glossy accents.

First step. Cut Your card to square 15cm x 30cm, score at the 15cm line to create your square card.


On the inside of your card pencil in lines at 7.5cm vertical and horizontal. This is your guide to cut your window evenly.


Start in the bottom right section of your card to create your first window. Use the guide lines on the Fiskars everywhere punch to get your square lined up with your pencil lines.use the 1st line in on the guide so when you cut there will be a gap. this will create the 'cross' section in the window.


Your first square is cut.


Turn the card upside down to put the cut square in the top left section. From now on we will be cutting the squares in a clockwise order.I have found by doing this i can get the squares the most even as you have the cut square on the left to use as a guide for the next punch.
Do the same as the step above. line up your square and punch.


Turn your card to make the last punched square to the top left section again and then follow the above steps and cut the 3rd square.


Finally turn your card again to make the last punched square to the top left and punch the final square.
You now have your window. If you are not 100 % give it a few goes on paper first to get the knack.


Here is your window card.


Next place your card into the brick texture folder and run through your die cutting machine. I had to do this twice to get the whole card embossed.


Once embossed trim off any card from the top or bottom that has not been embossed. i had to trim about 1/2 cm off the bottom to tidy the card up.

 The trimmed card.

 next cut a piece of white card-stock to fit inside the card for the background. I used express it blending card-stock as i will be using Copic markers to colour in.


 Glue or double side tape the white card-stock into the inside of the card. Once you have done this close the card and with a pencil trace around where the window holes are. This will help you place your stamped images in the best position for maximum effect when the card is closed.


Stamp your images into the card. Ensure when the card is closed that you can see the important parts of the stamp to give the"looking through the window" effect. I have gone with lawn fawn stamps to create a Christmas theme. I really wanted to do an open fire with the Xmas tree but i cannot seem to get lawn fawn cozy Xmas stamps ANYWHERE!!! Never mind I did the best with what I had.

 Colour in with Copic markers (or any colouring medium), use glitter and glossy accents to add sparkle to the tree etc.


And there you have it... The finished card. Just like you were looking in on a cold Christmas night!


The Fiskars Everywhere Punch starter set comes with the square punch included. you can also get circle,scalloped square and scalloped circle as separate shapes. These extra shapes are interchangeable with your starter set. When i get my little hands on the other shapes i will put up some more tutorials for you using the different shapes.

09 May 2011

Using Fiskar Texture plates in a Cuttlebug.

I was Demoing for Fiskars last weekend at the Sydney Paper Craft Festival and one of the common questions was...."Can I use my Fiskars Texture Plates in my die cutting machine?"
"YES!!!" is the answer.
Here is a Tutorial on how i use my Fiskars Texture Plates in my Cuttlebug.

Firstly you will need the A plate.


Then grab your self a piece of Tim holtz grunge board. I have used card in the past but as grunge board is a little “spongy” it becomes more flexible if you are using card and paper.
I had spot grungeboard but is doesn't matter what one you use as it is just creating the extra thickness.

Then place a silicone mat.
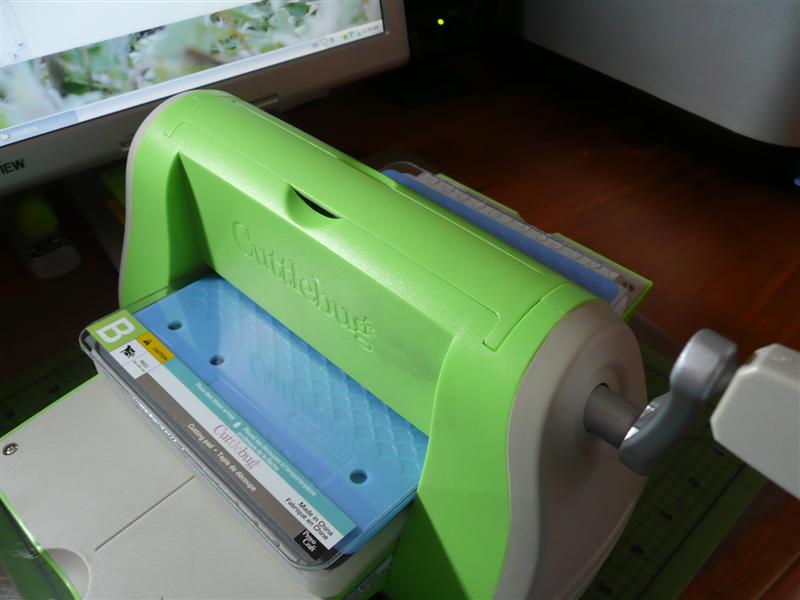
I brought a silicone baking tray from the reject shop for $3.00 and cut it down to fit my cuttlebug...a heap cheaper than buying a one specifically for your diecuting machine.

Then the paper you want to emboss. I have used pearl paper here so you can see the embossing at the end clearly but this “sandwich” works fine for card also.

Next place your Fiskars texture plate the pattern you require face down.
(I have placed down the Peacock feather texture)

Lastly place the B plate from your cuttlebug.
Run the “sandwich” through the Cuttlebug........

........and here is the embossed paper!

I have the fiskars “sandwich” written on the back of my A plate so i do not forget it.

And here is the finished card.
I have used the texture plate my Fiskars trimmer and Fiskars water boundary punch.
So I hope this helps everyone out there to blow the dust off your old Texture Plates and give them a new lease of life!!!
