Showing posts with label minc machine. Show all posts

20 July 2021

How to foil acetate using the Heidi Swapp Minc machine

Hi there! I hope everyone is doing well!
Today I'll be showing everyone how to foil acetate using the Heidi Swapp Minc machine and Silhouette Studio. When using acetate and a printer make sure you have purchased the correct acetate for your printer. there is inkjet and laser films out there and the wrong one will not work. 
Ok so lets check out the tutorial!

1- Open the software you are using to print your design/text. I am using silhouette studio.
Click on the text icon.


2- Type your text. Select the text style icon.


3- Change your font. I am using the font Timberly script from fontbundles.net


4- Select your text and adjust the spacing so the text overlaps. Next click the weld icon.


5- Click on the fill color icon and fill the text with black.


6- Next click the line icon and then line color option. Change the line color to black also.


7- Load the acetate into the laser printer. Click on the print icon. Next click preferences.


8- In the preferences options, change the the media type to transparency. Make sure your printer is set to the highest quality setting also. Click print.


9- Place the acetate into the transfer folder and place the foil over the top.


10- Set your minc machine to 2. Once it heats up and the light goes green place your transfer sheet through the minc machine.


11- The acetate is now foiled.


12- If you see any small spots that are still black you can prevent this by ensuring that your acetate has been wiped down with a microfibre cloth first. If you have a quickie glue pen you can also touch up any black spots with the glue, let dry and run through the minc machine again.


07 June 2021

Creating a foiled print and cut file using silhouette studio and the Heidi Swapp Minc machine

Creating a foiled print and cut file using silhouette studio and the Heidi Swapp Minc machine is an easy process to do. check out the tutorial below to help you get started!!!

1- Open the silhouette studio software. Click on the open file icon.


2- Select your file. I am using Tropical border SVG from designbundles.net


3- Resize your design. Click on the page setup icon and then the registration option.


4- Add the registration marks. this is so you can complete the print and cut.


5- Next you need to create an offset to cut around the image once foiled.


6- As you can see, once the offset is completed the image is in more than one piece still. This can happen with some designs. There is a work around this issue.


7- Go to the shape tool and draw a rectangle. place over the gap that caused the parts to offset separate.


8- Select both the design and shape. Group together.


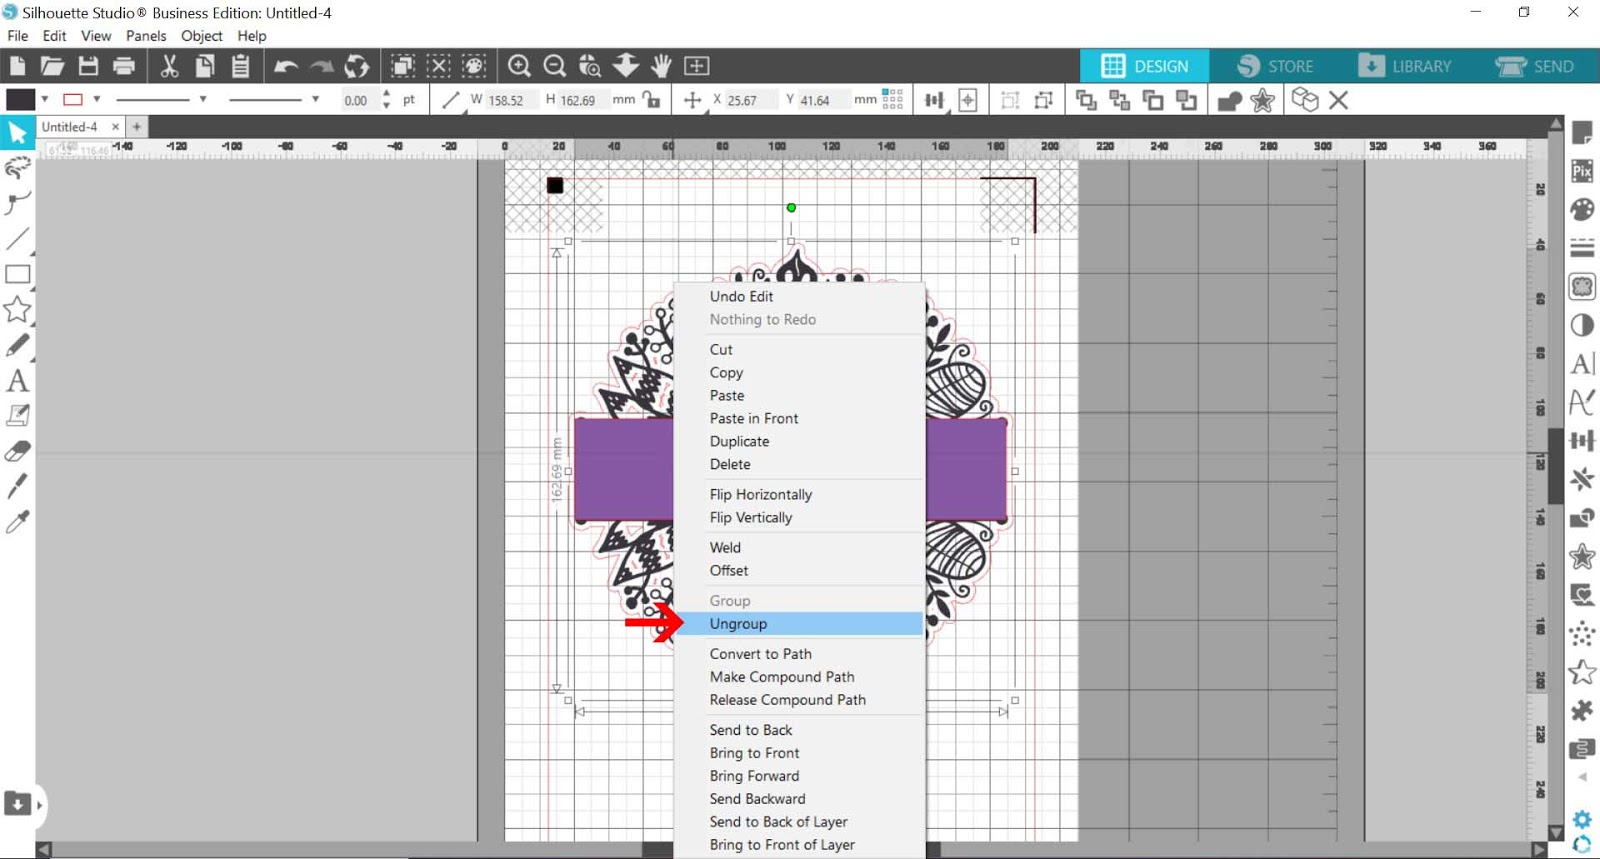
9- Click  the offset icon.


10- Once your offset is created, select the design and ungroup from the shape.


11- Move the shape away then delete it. You will see that the offset now covers the whole design.


12- There can sometimes be little parts of the offset you may need to remove. Select the image and release compound path.


13- Select any odd cut lines you do not need. Group back together.


14- Click on the print icon and make sure the preferences are set to the highest print quality setting.


15-your design is printed with the registration marks. We need to make sure these are not foiled so the silhouette machine can use them to print and cut.


16- Place the foil over the design avoiding the registration marks. Place in the transfer folder. Next place a piece of baking paper over the foil. By covering with foil this will avoid the registration marks transferring o the folder and not being able to be read by the silhouette.


17- Set the minc machine to 3 and run the transfer folder through the machine.


 18-Your design will be foiled but the registration marks will not be foiled.


19- Place the design on your cutting mat. Go to the send screen. Click on line type and select only the red line for the offset to be cut. Select the media and cut type. Click send.


20- The machine will start to cut the design.


21- Your design is now cut.


27 May 2021

How to use a glue pen with the Heidi swap Minc machine

When wanting to foil while using your silhouette machine and a Heidi Swapp toner pen is out always easy. I have found in the past that the toner pen is very problematic. It can run out quite quickly as it constantly needs to be primed to get ink through the tip.
So I tried to look for an alternative.  And after looking at what I had at home and one of my staples in my stash was a quickie glue pen. You can buy them from your local craft store or on Amazon .

I tried the glue pen in my silhouette 3 and it worked great.
Below is a quick tutorial on how to use it.

1- Open your software program. I am using silhouette studio software. Click on the text icon.


2- Select your design. Click OK.

3- Click on the fill icon.


4-Remove the fill color.


5- Go to the send screen. Change the action from blade to sketch tool.


6- Place the glue pen into the pen holder.


7- Send the design to the silhouette machine. The glue pen will start drawing your design.


8- You can see on the card that the design is drawn with the glue pen. Make sure the glue design dries before you prepare it to go through your minc machine.


9- Place your card in the transfer folder, then carefully place the foil on the top.


10- Turn your minc machine on and set to 2. Run through the machine.


11- Your design is foiled.


28 February 2021

How to make foiled sticker using the Heidi Swapp Minc and Silhouette studio.

Hi there everyone!
Today I am going to share with you how to create a foiled sticker using silhouette studio free software and the Heidi Swapp Minc machine. 
With this technique you can use other software like word or inkscape. the only difference for me with silhouette studio is I can create a print and cut so I can get my cutter to cut out the shape of the sticker. Alternatively you could use say some pre cut Avery stickers and use the free software that comes with those stickers. 


1- Open Silhouette Studio. Click on the open file icon.


2- Select your design. I am using Valentine cat couple SVG from design bundles.net


3- Select your design and resize.


4- Click on the shape icon. While holding the shift key, create a circle.


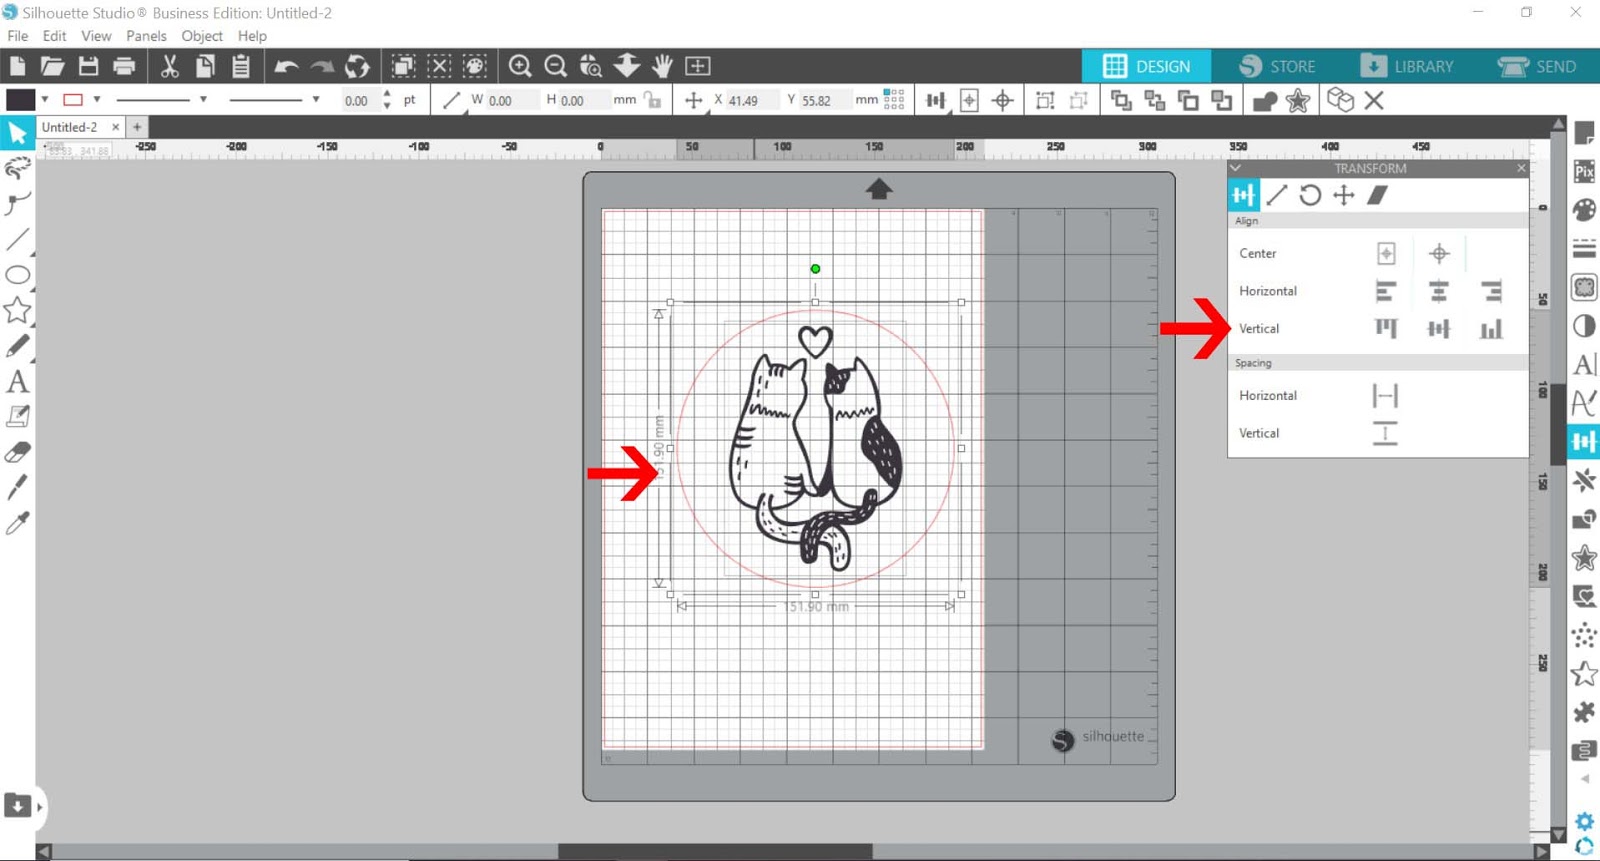
5- Centre the design inside the circle.


6- Group the design and circle together.


7- Click on page setup and add registration marks for print and cut.


8- Click on the replicate icon and replicate your design.


9- Continue to replicate to fill the page.


10- Click on the print icon. Set the print quality to high and then print.


11- The design is printed on the sticker paper.


12- Place the foil over the design. Make sure you do not cover the registration marks. They need to be black to be registered in the silhouette. Place baking paper over the card and foil then place into a transfer folder.


13- Turn the minc on and set to 3. I am using plain white matte sticker paper. if using clear sticker paper I would recommend a setting of 2.
Run through the minc machine.


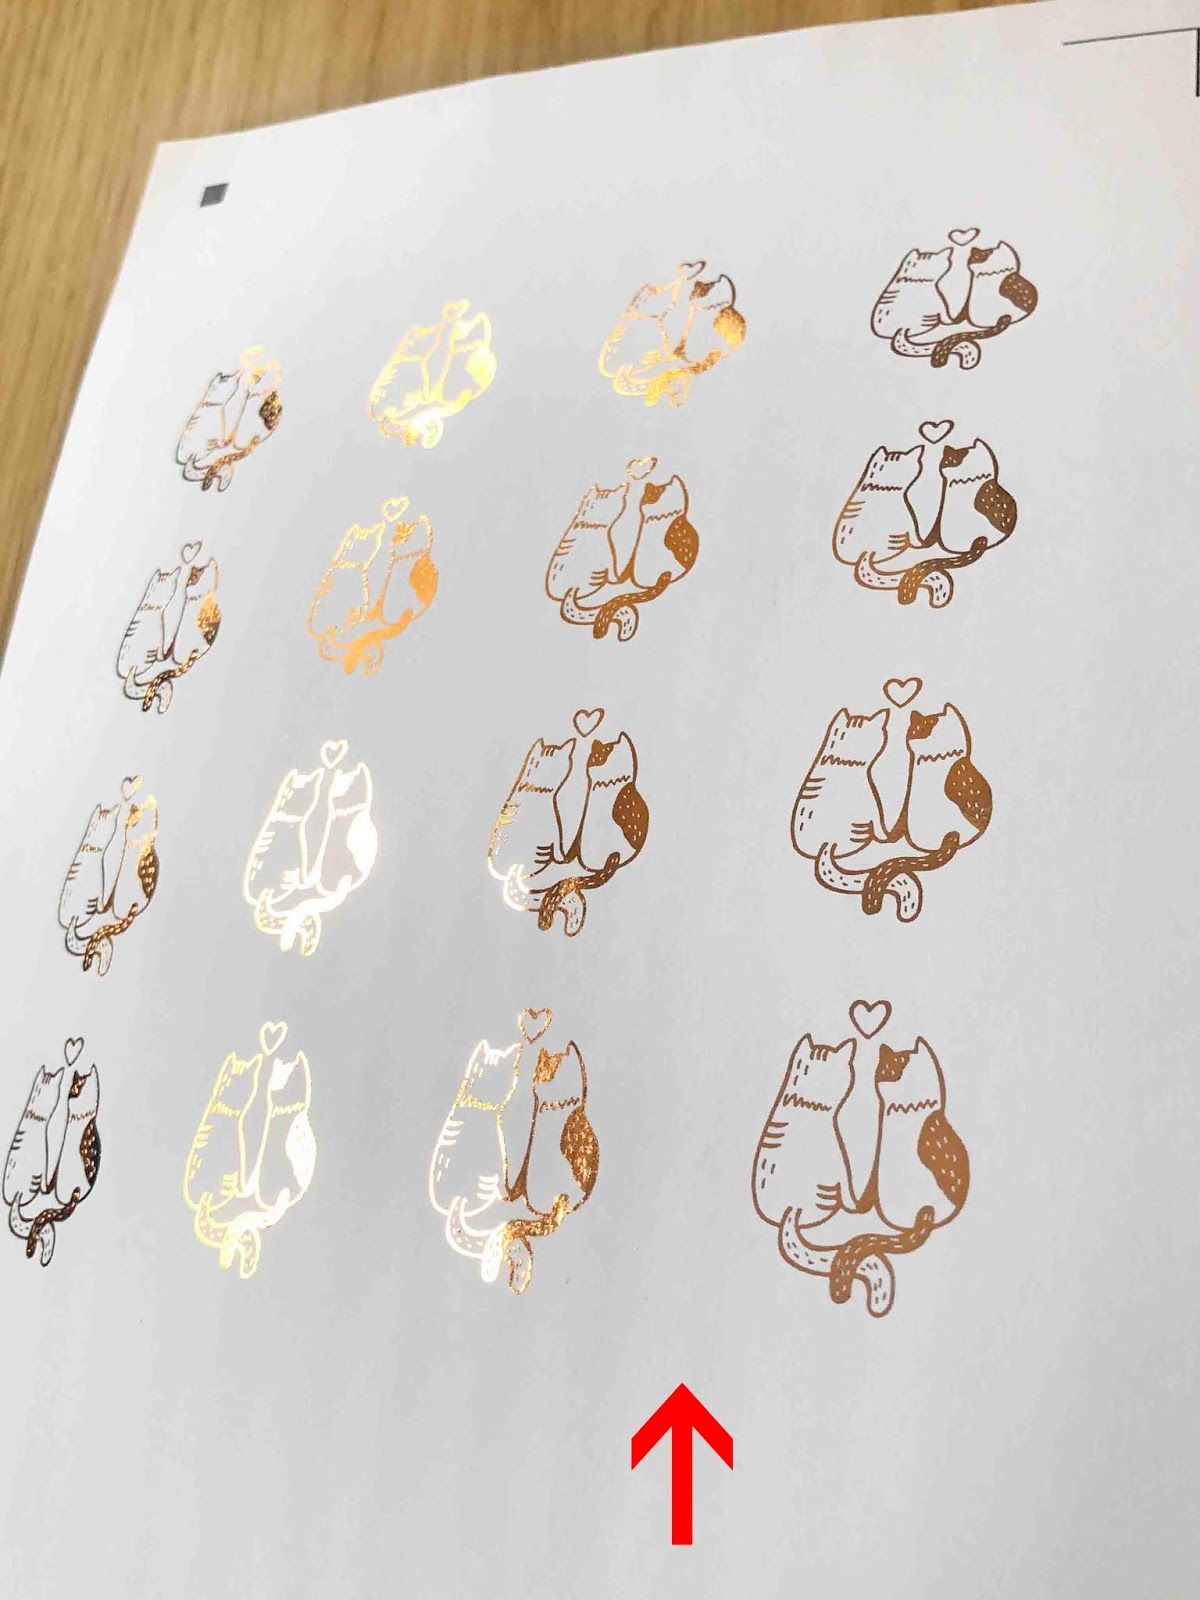
14- Remove the foil from the sticker papers. The design are now foiled.


15- Place on the cutting mat. Go to the send screen and click on the line option for cutting.


16- Select the line color that only cuts the outside sticker lines. Make sure the media type is set. Then click on send.


17- You design will cut the stickers. You can use the stickers for many needs.