04 April 2019

First time printing on Silhouette Alta Software.

When you get your alta its all excitement and fun to get it out of the box and then make your first print. and if you follow these steps  the first print will be a success.
Pick a project that comes free with your machine. you will know that this project is tried and tested and will print correctly.
The issues with free print files is you do not know if they will work with the Alta so by using a silhouette file you know it will work. if it does not it may be another issue or calibration that is needed.
Lets try our first print, I will be using the free dice that comes with the machine.


1- Load up the Silhouette Alta 3D printer software. For your first print pick something simple from the free designs that come with the software.
To do this click on the arrows to access your library.


2- Click on Library.


3- Access the free designs and select a simple design. I am using the die.


4- When you click on the image the 3D image will appear on your design space.


5- At this point you can adjust the size of the design. Click on the 3D print icon.


6- The next screen may take a few seconds to appear. This is the software creating the slicing of the design ready to print.  You can see the sliced design on your screen.
To zoom in use the roller on your mouse. To rotate right click your mouse and hold then move around to see different angles of your design.


7- You can also click on the play icon to see the printing process play through to see how your design will print.


8- At any point you can click on Print to start the 3D printing.


9- The 3D printer will print to get to 200 oC then start to print your design.


10- At any point you can click on the stop icon to stop the 3D print.
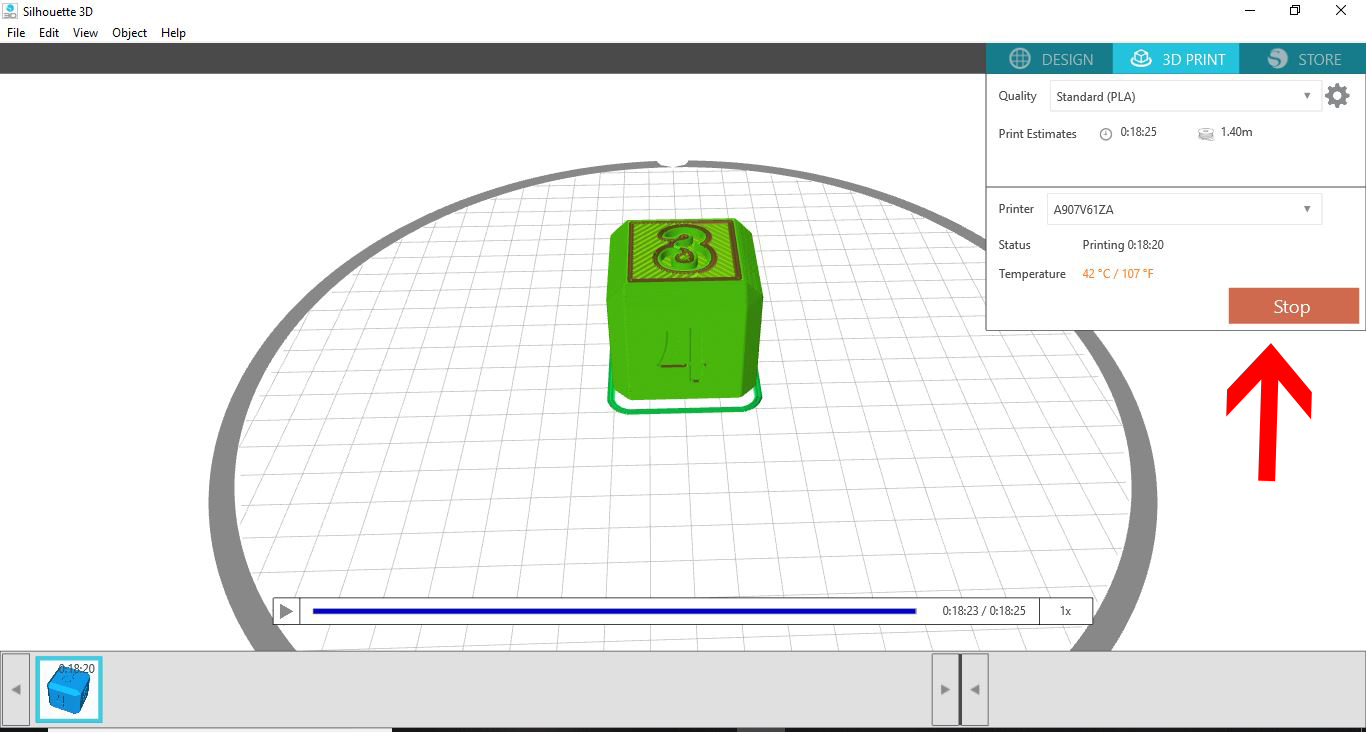

11- Once your print has finished (or if you have manually stopped it) A message will appear letting you know that your Is finished and to allow the printed file a few minutes to cool.


12- The print is now complete. You can remove the printed design from the base plate and detach the brim that is around the design.


29 March 2019

Silhouette Alta 3D printer software overview.


The Silhouette Alta is a wonderful new machine that was released last year.
The software for the Alta is slightly different to any other Silhouette  software so there is a new learning curve.

Below is a basic overview of the silhouette Alta software.


1- Load the Silhouette Alta 3D software. You will see your design space on the screen. This is the same "size" as your printable area. Anything that overhangs will not be able to print.


2- Under the File section, you have your basic tools to open a file, save your files and access your print settings.


3- Edit offers you the options to cut, copy and paste designs, duplicate and edit your preferences.


4- When you select the preferences in the Edit drop down box, you can adjust the language, and the unit of measurement.


5- In the View drop down menu, you can adjust how you see your designs.


6- In the Object drop down menu, you can group and ungroup your designs and rotate them as well. Another important feature is to use the level section so you can drop your design to the design bed.


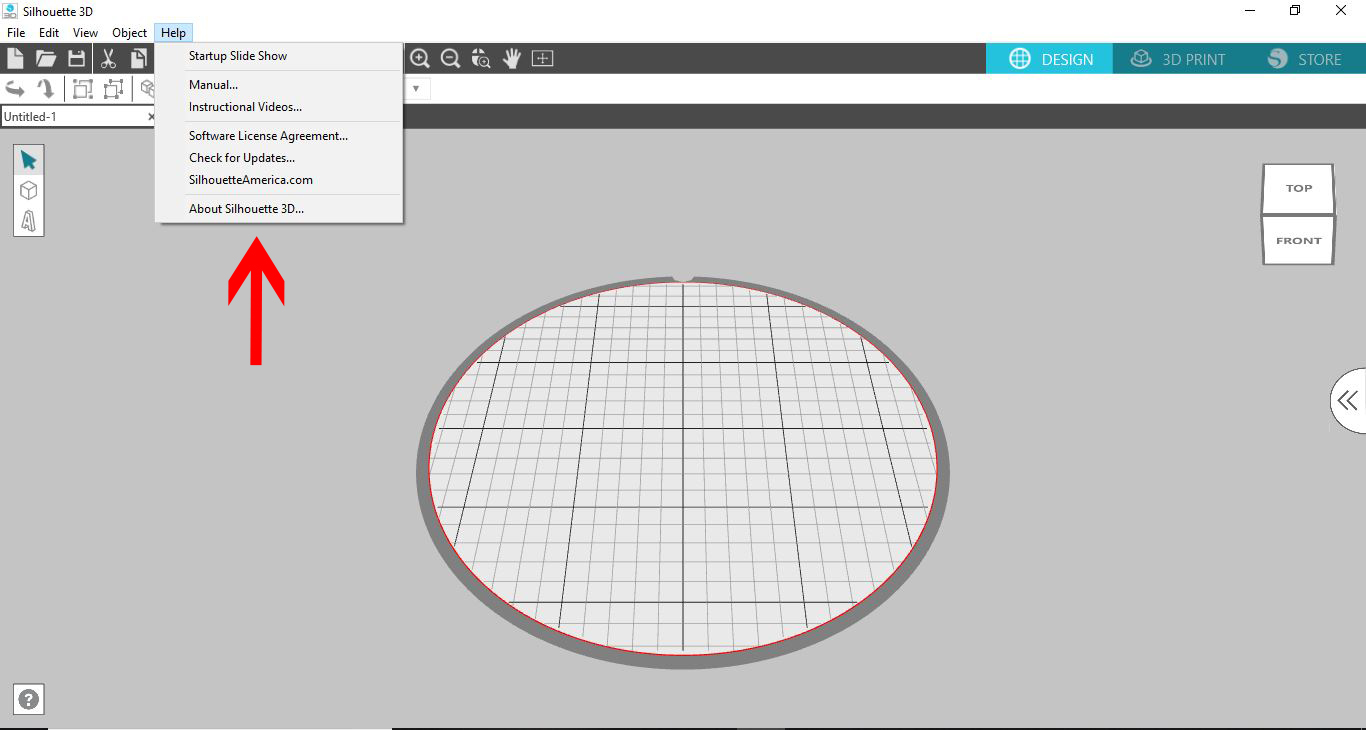
7-  You also have a Help drop down option. Here you can fin d video tutorials, the manual for the machine and the machine information.


8- You also have on the right side of your screen a view option. You can use this to move the design area to see the top, bottom, left and right so you have a full 360 degree rotation.
There is also a pull out tab. this can access the library.


9- You can sync your Silhouette Studio files to the 3D software. To find your files, click on Library.


10- In the library you will see a new folder that says 3D designs. Here you can find any 3D design that you may have purchased in Silhouette design store.


11- When you click  on it all the 3D designs will appear clearly. You can at any click any of the images and they will appear on your design area.


12- You also have a user design folder.


13- Here you can save your own creations.


14- At the top you also have the 3D print drop down box and then the Silhouette design school icon.


15- When clicking the design store icon you will be sent to your browser to open the design store.


16- On the left you have your toolbar.


17- You have a shape option. Here you have the option to select different 3D shapes to create your designs.


18- you also have a Text option.


19- Once you click on the text option a new pop up will appear.


20- You can add your text and click on OK.


21- The text will appear in 3D ready to print.


Over the next few weeks i'll add more tutorials on how the Alta software works.


26 July 2017

Silhouette V4 Software New Layout Part 3


The New Silhouette V4 software has been released and there are a lot of changes with the layout. This is part  of three several tutorials showing where all the common functions are now located.
I am using the Designer Edition to run through the new layout.
1- In the top toolbar section there is a middle toolbar section that changes dependent on what icon you have selected in the left toolbar.
The standard options in this part of the tool bar is as follows-


2-  The first icon will let you know what options are available to use dependent on what icon you have selected in the left toolbar (1), Fill colour (2), Line color (3), Line style (4).


3- The next section of this part of the toolbar is your height and length there is also a option to lock and unlock the size dependent if you need to keep the aspect ratio (1). you also have the option to adjust the placement of your image on the design space(2).


4- In the 3rd part of the toolbar you have Group(1) and ungroup(2) options. You also have Send to front (3), send to back(4), bring forward(5), send back(6), weld(7), offset(8).


5- Lastly we have duplicate(1), delete(2), centre images(3), centre(4), horizontal align left(5), horizontal align centre(6),horizontal align right(7),vertical align below(8), vertical align middle(9)


22 July 2017

Silhouette V4 Software New Layout Part 2


The New Silhouette V4 software has been released and there are a lot of changes with the layout. This is part two of several tutorials showing where all the common functions are now located.
I am using the Designer Edition to run through the new layout.
1- Select tool.  Is the the same as the V3 software in the top left.


2-  Edit points. We now have a icon for edit points. This is a great new option where you can select any part of your design then select the edit point icon. When selected in the top toolbar all your options will appear that use to appear in a pop up box in V3.


3- Line tool. All the line tool options are now located in one icon. When you hover your select tool over the line tool a pop out box will appear with all the line options you can select. These were previously separate on the left toolbar in V3.


4- Shape tool. All the shape tools are now located in the same icon. Hover your select tool over the shape tool and a pop out box will appear giving you the option to select different shapes.


5- Draw tool. This includes draw freehand and draw smooth freehand.


6-  Then next 4 icons in the left toolbar include Text (1), Eraser tool (2), Knife tool (3), Transform property tool (4). Each of these tools when selected, their properties will now appear in the top toolbar rather than a pop up window like in V3.


7-  Next there is a top tool bar. Here you will find basic functions you will need for use with the silhouette software.

1- New Document
2- Open document
3- Save
4- Print
5- Cut
6- Copy
7- Paste
8- Undo
9- Redo
10- Select all
11- Deselect all
12- Select by colour
13- Zoom in
14- Zoom out
15- Drag over a shape to zoom
16- zoom in and out using the mouse
17- Pan using mouse
18- Fit to window
19- Design space
20- Silhouette store
21- Library
22- Send to silhouette.