28 February 2021

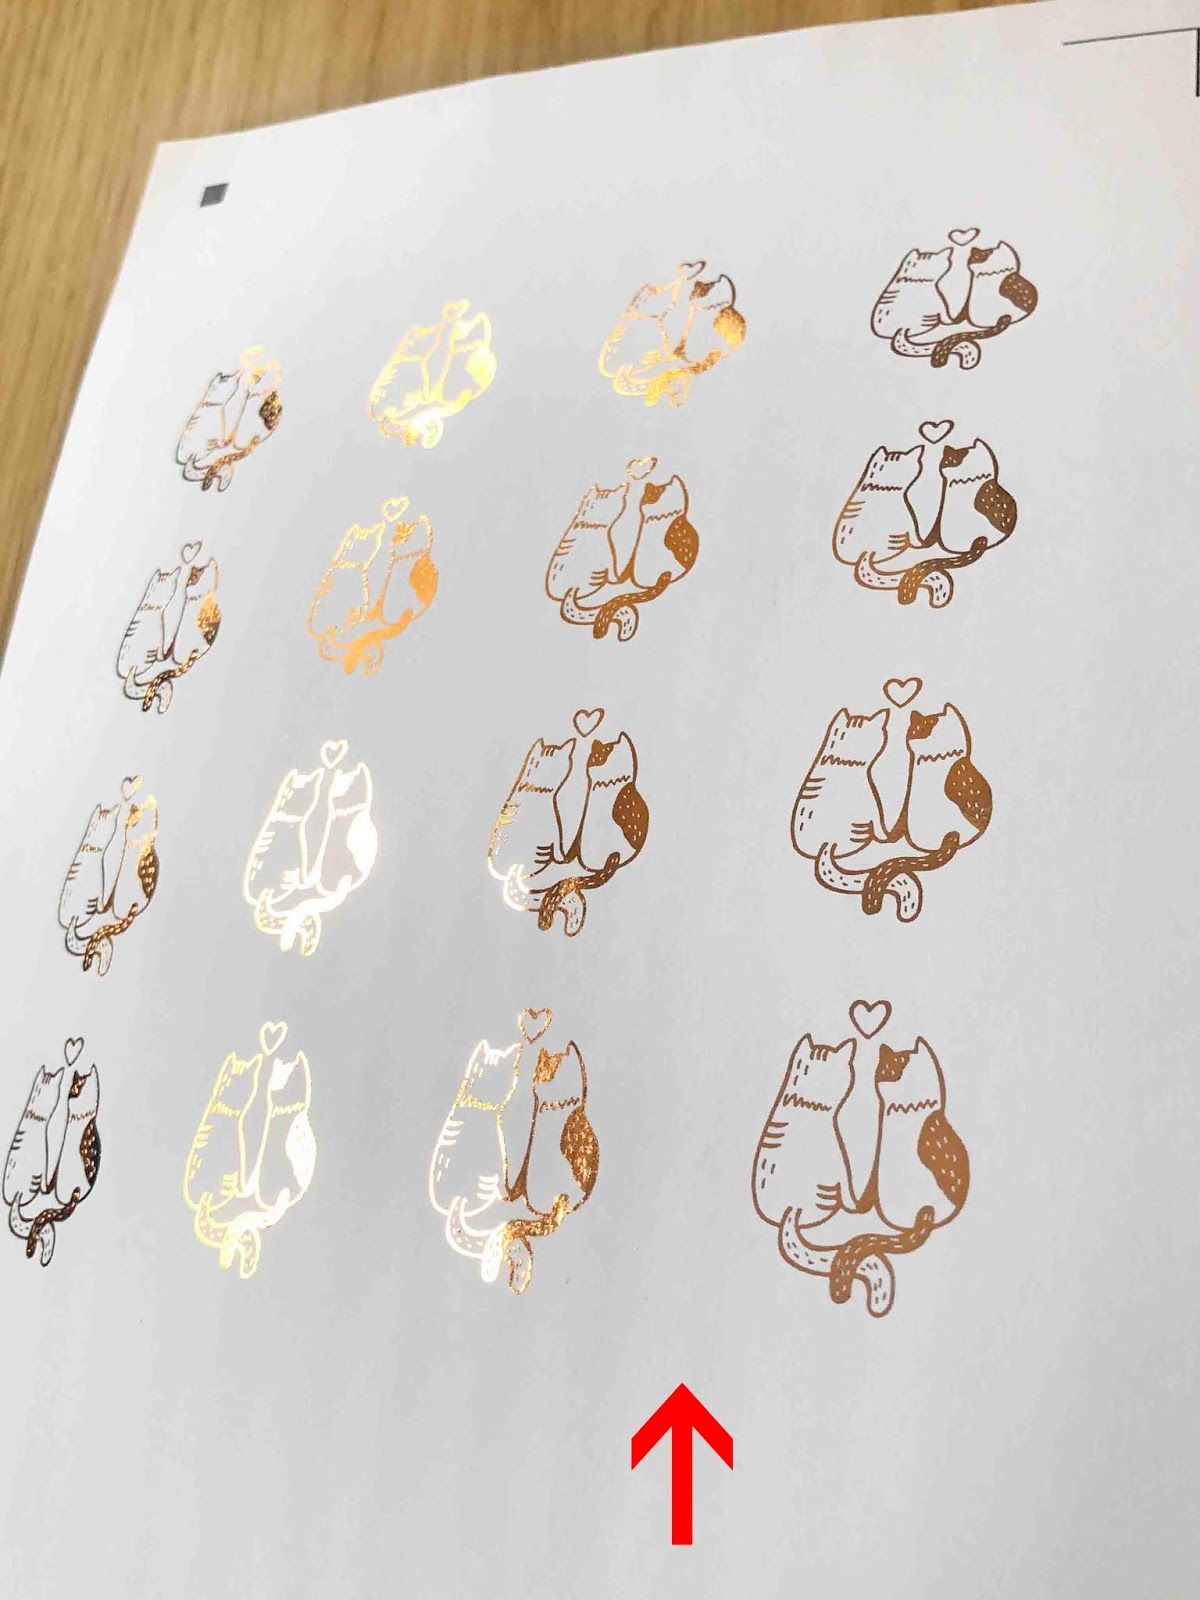
How to make foiled sticker using the Heidi Swapp Minc and Silhouette studio.

Hi there everyone!
Today I am going to share with you how to create a foiled sticker using silhouette studio free software and the Heidi Swapp Minc machine. 
With this technique you can use other software like word or inkscape. the only difference for me with silhouette studio is I can create a print and cut so I can get my cutter to cut out the shape of the sticker. Alternatively you could use say some pre cut Avery stickers and use the free software that comes with those stickers. 


1- Open Silhouette Studio. Click on the open file icon.


2- Select your design. I am using Valentine cat couple SVG from design bundles.net


3- Select your design and resize.


4- Click on the shape icon. While holding the shift key, create a circle.


5- Centre the design inside the circle.
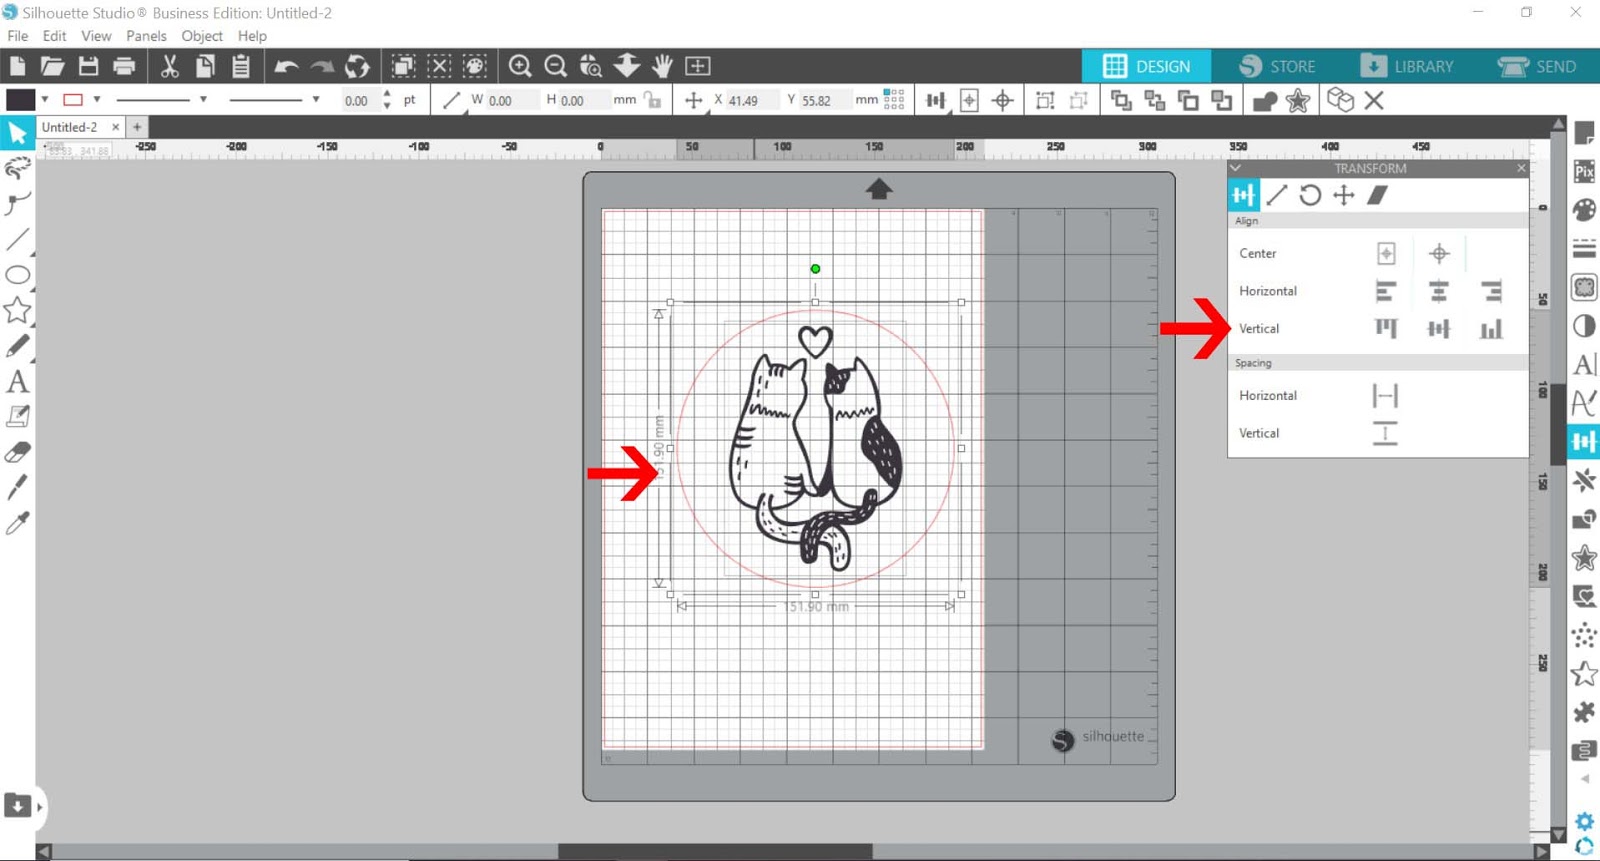

6- Group the design and circle together.


7- Click on page setup and add registration marks for print and cut.


8- Click on the replicate icon and replicate your design.


9- Continue to replicate to fill the page.


10- Click on the print icon. Set the print quality to high and then print.


11- The design is printed on the sticker paper.


12- Place the foil over the design. Make sure you do not cover the registration marks. They need to be black to be registered in the silhouette. Place baking paper over the card and foil then place into a transfer folder.


13- Turn the minc on and set to 3. I am using plain white matte sticker paper. if using clear sticker paper I would recommend a setting of 2.
Run through the minc machine.


14- Remove the foil from the sticker papers. The design are now foiled.


15- Place on the cutting mat. Go to the send screen and click on the line option for cutting.


16- Select the line color that only cuts the outside sticker lines. Make sure the media type is set. Then click on send.


17- You design will cut the stickers. You can use the stickers for many needs.


30 December 2020

Foiling with multiple colors using the Heidi swap minc

Hi there everyone!!!! 
Today I have a tutorial for you to show how to foil in multiple colours.
The concept is quite easy, as long as you use baking paper to stop the toner from your design sticking to your plastic folder.

Open the software you want to use to print your design to foil. I am using Silhouette studio. You can download it for free online.  Click on the open icon.


2- Select your design. I am using Valentine subway art from designbundles.net


3- Select the design. Click on the fill icon.


4- Change your design all to black.


5- Next select the line style icon. Select the line color and change to black also.


6- Click on the print icon. a new window will appear. Click onto preferences.


7- Make sure the print settings are to the highest quality possible. Click ok and then print.


 8- Print your design with your laser printer.


9- Place the colored foil over the parts you would like to have that color. Place a piece of baking paper over the card and foil, then place into the transfer folder. The baking paper will stop the toner adhering to the transfer folder.


10-Run through the minc machine in setting 3.


11- Remove the foil.


12- Repeat the above steps and place the next colored foil over the parts you need gold. Place the baking paper over the top and then in the transfer folder.


13- Run through the minc machine again. Remove the baking paper and the gold foil.


14- Place the next color foil over your design. As this is the last color I am covering the whole design. The foil will not stick to the already foiled parts. Run through the minc on setting 3.


15- Remove out of the transfer folder and take foil off. your design is foiled.


24 October 2020

Creating a basic jewelry box with the Silhouette Alta.

Hi there everyone!! today I have a tutorial for you on how to create a basic jewelry box in the silhouette Alta software.

Some of there steps are super simple and with the right file/svg you can design something you can further paint and use for any trinkets.

1- Open the Silhouette Alta software. Click on the library tab on the right.


2- Click on the library.


3- Select a basic design. Double click on the design.


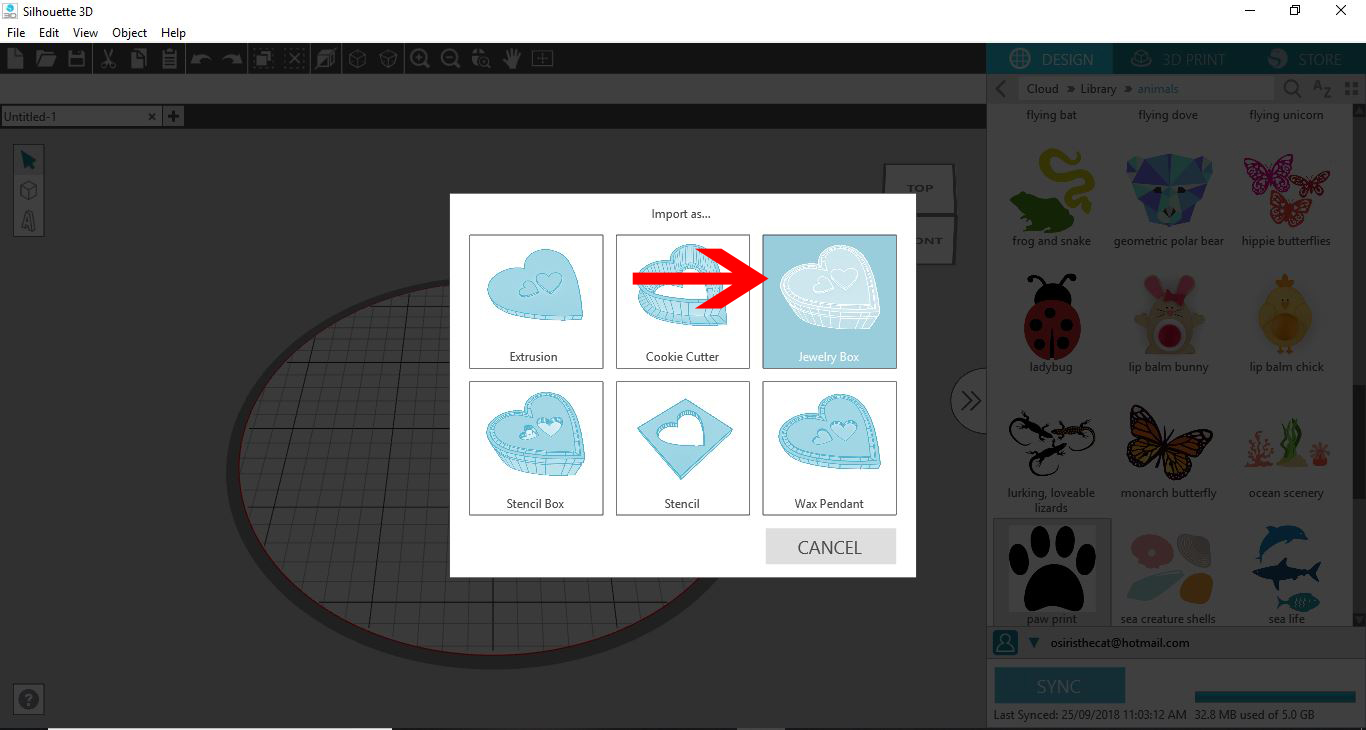
4- A new window will appear. Click on the jewelry box icon.


5- Your 2D design will appear as a 3D jewelry box.


6-  You can adjust the size of the box using the nodes. You can even adjust the height as well.


7-  To adjust individual parts of the box you need to right click and ungroup the design.


8- You can separate the lid from the base.


9- When you click on the 3D print icon, you will see that the printer wants to print the design in many parts. This is great if you would want to have several different colours and to glue them together. If you want them all to print as one file you will need to group the parts in the design area.


10- Select all the parts and right click then group.


11- and now you can see that the printer will print as one part.


12-  If you would like to make the most of your design, you can add a base to part of your box to make a separate compartment. Go to the shape icon and select the cube.


13- Place the cube in the design,


14- Adjust the height of the cube to make to thickness the same as the rest of the base area.


15- Select the new base and the original box and right click then group.


16- You can now print the box.