16 May 2019

How to create a basic cookie cutter in Silhouette Alta 3D printer.

Hi there Everyone!

Today I will share with you how to create a basic cookie cutter in the silhouette Alta 3D software.
Cookie cutters are not a cheap product and with the Alta you can create your own to cut dough and fondant. You can create a basic shape or even a cutter that can have names or designs to imprint.


1- Open Silhouette Alta 3D software. Click on the right tab to access the library.


2- Click on the library.


3- Select a basic 2D file. Double click on it.


4- A new window will appear. Select the cookie cutter option.


5-  Your design will appear directly as a cookie cutter shape.


6- Adjust the size and height to your needs. click on the 3D print option. Your design will start to create a sliced design to print.


7- Once complete you can click on the print icon. this will print your design.


08 May 2019

Using Silhouette Studio to create text for the Silhouette Alta 3D printer software.

Hi there everyone!!!

With the Silhouette branded products you will find that they are pretty much all interchangeable with their software. You can use the silhouette studio software in tandem with the silhouette Alta software.

Below is how you can use the silhouette studio software to create text ,then import into the 3D printer software to make 3D text.


1- Open up Silhouette Studio (free version) Click on the text icon.


2- Type your text.


3- Select the font you want to use. I am using Cheesy Grits font from fontbundles.net


4- Once you are happy with your text Go to File - Save as - Save to hard drive.


5- Save your text as a studio file. (You can use studio files in the Alta 3D software.)


6- Open the Silhouette Alta 3D software. Click on the open file icon.


7- Click on Open.


8- Select your studio file and click OK.


9- A new window will appear. You need to import your text as an extrusion.


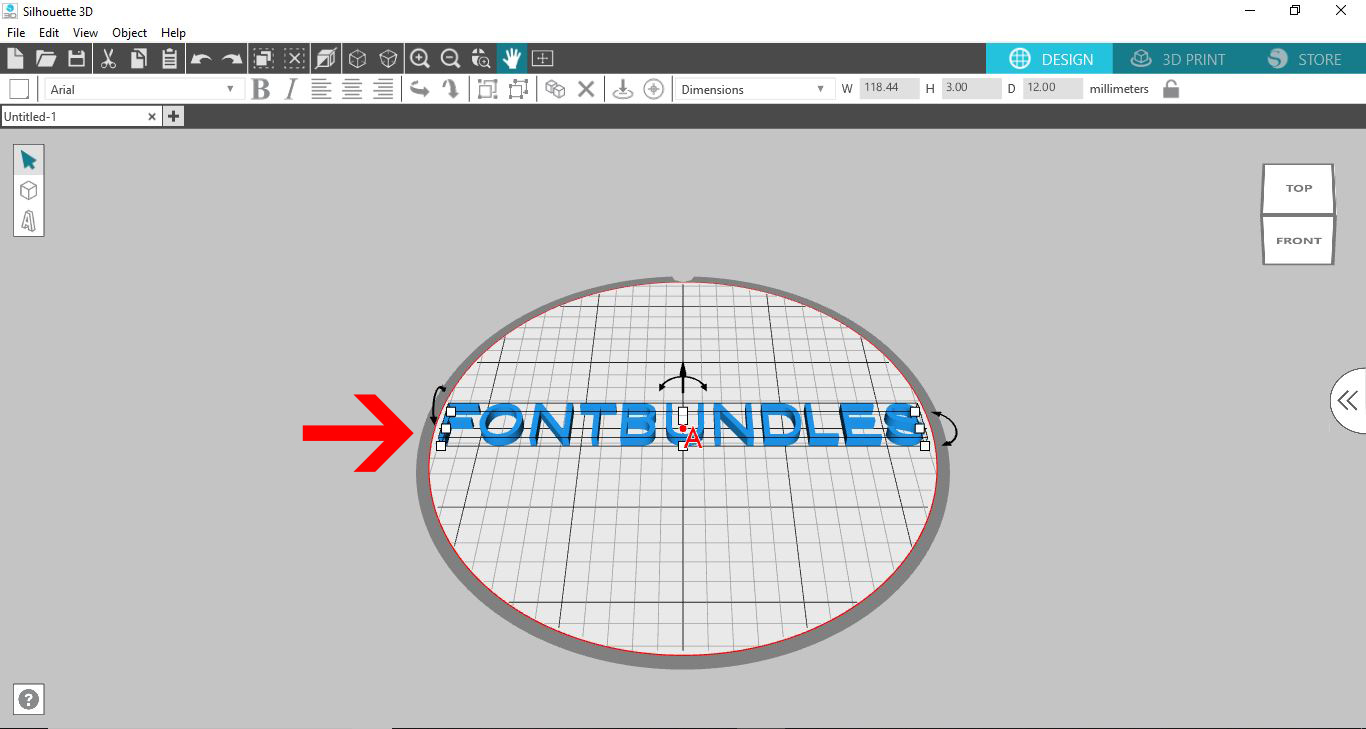
10-  Your text will appear on your design space.


11- With the text selected right click and select ungroup.


12- Your text will be separated so you can move and alter each individual letter.


13-  Adjust the text until you are happy with the shape, height, and size.
I will now make the text as a key ring so we need a little loop to attach a slip ring. Click on the shape icon and then the tube icon.


14- Your tube will appear.


15- Resize the tubes height and size to add to your text. Overlap it onto your text.


16- On a side view you can see the tube is now thin and is actually inside part of your letter.


17- Click onto select all so everything is selected.


18-  Next right click on the selected design and group. By grouping the letters and tube shape they will print as one object, not lots of separate objects. (the same as weld function is used in Silhouette studio).


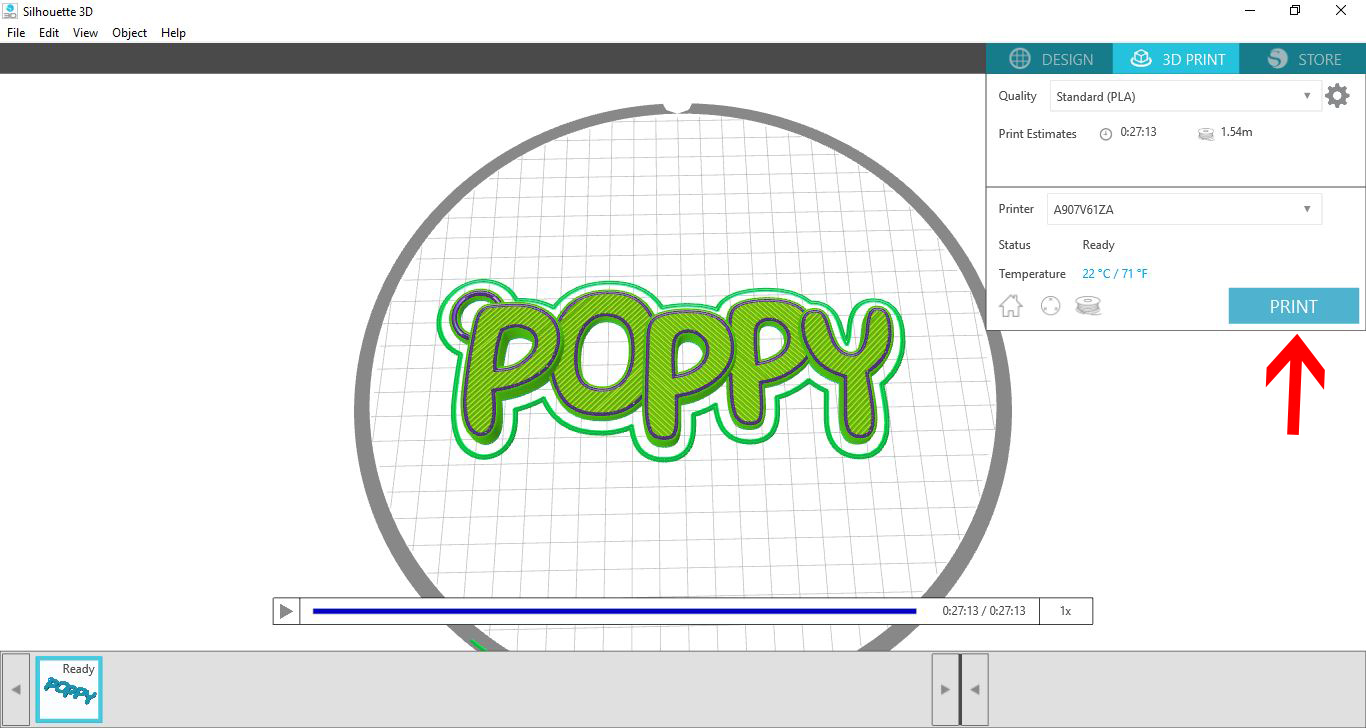
19- Click on 3D print and then adjust your setting and then print your design.


20- You design will print at one object and can now be used as a key ring.


02 May 2019

How to use the text tool in Silhouette Alta 3d software

Hi there everyone!
The text tool is the Silhouette Alta software is great to add and create 3d printable text. Below is a quick tutorial on how to use the text tool.

1- Load your silhouette Alta 3D software. Click on the Text icon.


2- A new window will appear. Type your text. Click OK.


3- Your 3D text will appear on your design space.


4- You can click on the font drop down box to select your font. I am using Black Velvet 2 from fontbundles.net.


5- Your text will change to the font.


6- You can resize height, width and length by adjusting nodes that surround the text.


7- Click on the 3D print icon. This will slice your design and make it ready to print.


8- If you would like to have your text joined you will need to use a different process.

9- Click on the text icon .


10- Type the first letter of the text you would like to join together.Click OK.


11- Adjust the size of your letter.


12-  Repeat step 9-11 for every letter you need.


13-  Now you have all your letters, slightly overlap each letter (The same as you would when you are preparing text to weld in silhouette studio.).


14- Adjust the height of each letter. You can have each letter different heights if you like.


15- Once finished, Click on Select all.


16- Right click on the selected text and group your text. By grouping your text, the printer will print as one file rather than individual letters (similar you welding in silhouette studio software)


17- Click onto 3D print and then select your print quality and then Print icon.


18- Your text will print as one file.


19- Once finished you can see that the text is joined (welded).


28 April 2019

How to change designs in Silhouette Alta 3D printer software.

Hi there everyone!
When you get your Alta 3D printer i'm sure that you will want to change a design you have purchased. Sometimes you need to adjust for the usability of the design or change size or add to a design.
Below will show you the basics on how to alter your designs. I will add more detailed tutorials at a later date, but for now the basics of altering your designs is below.


1- Load the Silhouette Alta software. Click on the tab to access the library.


2- Click on the Library.


3- Go the the 3D designs you have loaded. (you can also load a 3rd party .obj or .stl file).


4- Select your 3D design. Double click to apply to your design area.


5- Your design will appear onto your design area.


6- You will need to ungroup the different parts of your design. Right click and then select ungroup.


7- Pull all the sections apart. Select the part of the design you would like to replicate and then click on the duplicate icon until you have the number your require.


8-  Rearrange the parts to suit your needs. Select them and then click on group. this way they will print as one object not 3 (its kind of how the weld function works in silhouette studio.)


9- Alter anything else you would like to use, then with everything selected, right click and group as one object (or if you need to print in different colours leave ungrouped and glue at a later date together.


10- Once you are happy, click 3D print and select the quality of print and then load filament and print your design.