Stencils are a great source of technique. You can use them to emboss, paint and stencil.
You can easily make your own basic stencil using the silhouette alta.
Below are the steps to do this.
1- Open Silhouette Alta software. Click on the right side tab.

2- Click on the library folder.

3- Find a folder where you may have background files.

4- Double click on your image.

5- A new window will appear. Click on the stencil option.

6- Your design will appear as a stencil. With this particular design there are gaps from the edge to the design which need to be joined to create a whole stencil.

7- Click on the shape option. Then click on the cube.

8- Flatten the cube to the same height as the stencil.

9- Resize the flattened cube to a long thin rectangle. Place on the edge of your stencil to join the middle of the design to the edge.

10- Right click on the rectangle and duplicate.

11- Move the duplicated rectangle to the right joining the middle to the edge.

12- Right click and duplicate again.

13- Rotate then shorten and place across the top of the stencil to join the edge with the middle stencil design.

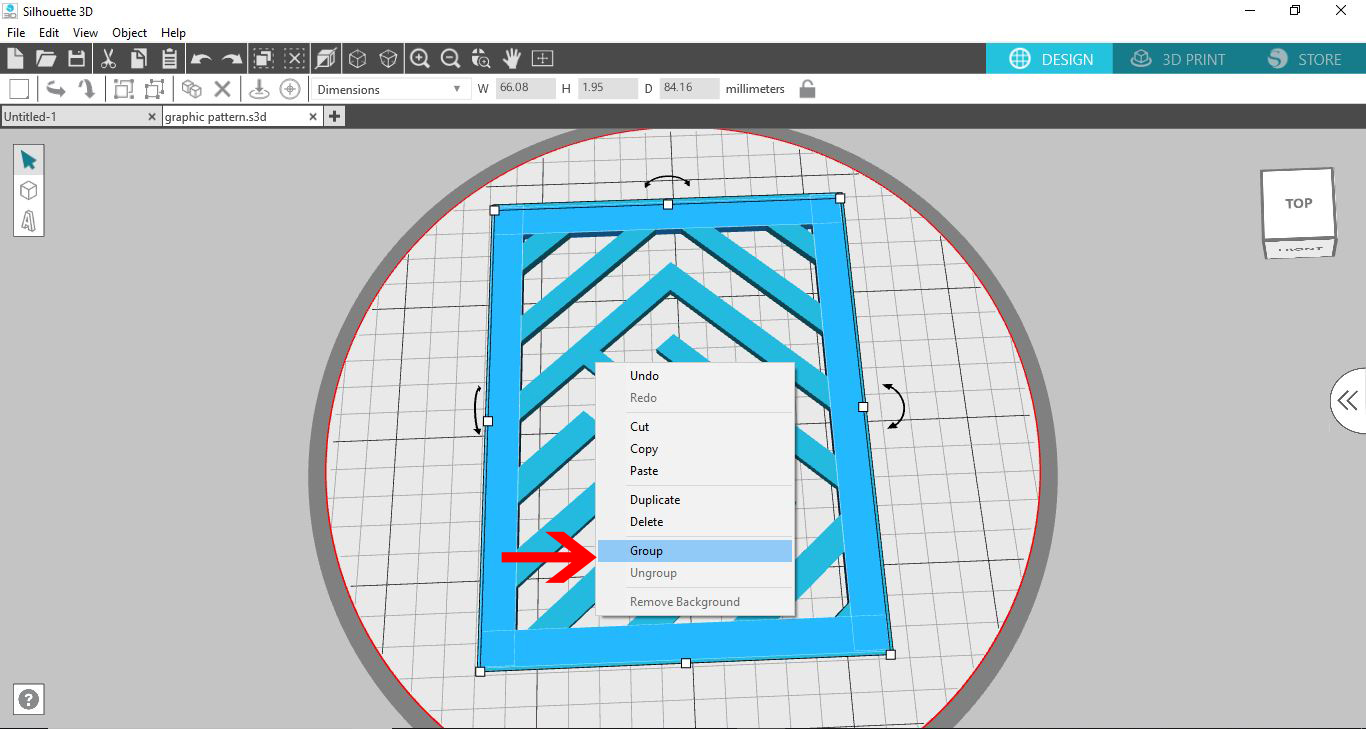
14- Repeat again to the bottom of your design. then click on the select all icon.

15- Right click and group. By grouping the pieces the printer will print as one design not several separate small ones.
16- Click on 3D print and then select your print options and print.

17- Your finished design can now be used as a stencil with paint or spray. You can also use these stencils through a manual die cutting machine to dry emboss patterns.


