31 May 2011

Poppy Crawls.....

How Cute it Poppy! she has just started to crawl.....backwards i might add...but still...crawling!!!

Tuesday Tutorial... making little tickets.


Hello there! Today i am going to show you how to create a little 'ticket' to use on your cards and scrapbooking using the Fiskars shape express rectangle template, and your Fiskars eyelet setters.

Firstly, you need to grab some card or paper to create your ticket. I am using Kraft card as i found it is quite stiff and gives a more 'real' look to my ticket.
Then, cut your rectangle. I have used the smallest shape as it almost the same size as a real ticket.
This is what it should look like.
Then carefully get your eyelet setter (the biggest one of the set of 3) and cut out a 1/2 circle from each corner and the two long sides. If you use a bigger rectangle to make say a journalling ticket. you may want to use a circle punch to do the corners.
This is what you should have now. Almost a ticket.
Then stamp in a quote or write one in to your taste.
then match up the ink and go around the outside edge to finish off the ticket


Here is a card I made for the Christmas in June month at the fiskars blog http://fiskarscraft.typepad.com/my_weblog/
With a bit of distress ink the ticket looks great!


30 May 2011

Tuesday Tutorial begins tomorrow....

I am starting tomorrow a weekly post called "Tuesday Tutorial" and will demonstrate a technique or idea using different products.
Tomorrow i will be sharing a technique to make tickets for your cards using Fiskars products.
so check it out tomorrow.

24 May 2011

Zoe is loving my lawn fawn stamps too!!!

Zoe has sussed out my Lawn Fawn stamps and has had a go at creating her own cards. now i usually watch her like a hawk when using my stamps, copic markers (yes! i DID say copics!) etc but i let her have full reign of the place.....not the best of ideas i will have to admit! Zoe made some great cards but did not clean my stamps correctly.... and she KNOWS to use the stamp scrubber!...and now some of my beloved Lawn Fawn stamps are stained, and i just do love to keep them clean!(Yes i am a little OCD) but in saying this i do love her imagination!


another couple of cute cards.

Here are a couple of cards i made while demoing for Fiskars the other week.
This first card i used critters in the snow by Lawn Fawn http://www.lawnfawn.com/products/critters-in-the-snow ,
bazzil card stock and coloured pencils (i did not have copics to hand). I just love the everywhere punch for creating little windows in ...well just about anything and getting that great "peek-a-boo" with my card!

Next is another card i made at the show. Again i only had colouring pencils and no copics(just tooo much stuff to carry!) I used lawn fawn critters in the burbs http://www.lawnfawn.com/products/critters-in-the-burbs,
My favourite things stamps happy thoughts https://www.mftstamps.com/catalog/product_info.php?products_id=1032 ,
Fiskars shape template cupcakes and more (for the clouds) http://www.abiscraft.com.au/shop/Fiskars-ShapeTemplate-Cupcakes-and-More.html

I just love lawn fawn stamps at the moment. they are great to colour in. I do wish that you could get them digitally also as I would just love to "super-size" some of the images to colour!

19 May 2011

A little mini album and some cards...


I have been given a task by Fiskars to create some projects using only the tools and papers etc they sent me the other day. The projects are to be looked at and maybe one may get chosen to be used in spotlight as a tutorial leaflet in store.
It really makes you mind think when you are limited to products you are given and know that all you use has to be sold in spotlight. especially when i buy most of my stamps from the USA.

I was given a collection of Bella Wedding papers and embellishments.
and some blank cards. I was also given 2 Fiskars tools to use in the project. these were the Medium linked hearts lever punch and the lever punch scalloped square (2.5inches)
These products were to be used and showcased in the projects...... oh what to do?????.... I have cupboard of Fiskars stuff just crying out..."use me...use me" and i could not!
Any way i set to work. I cannot really use stamps as spotlight don't really sell a lot of rubber stamps and they certainly do not sell copic markers,which are my colouring of choice.
but i managed to make 2 cards,and a mini album(see below) no picture in the album yet as i donot think that spotlight want pictures in it. buy ,Hey! i can always add some later.


What do you think?

15 May 2011

A card using Fiskars everywhere punch


Here is a card i have made using many Fiskars products.

To make this card You will need the following Fiskars products: Fiskars Border punch-leave it to weaver and the NEW everywhere punch starter kit.

1. Cut out a piece Black card approx 7 inches long. punch with the Fiskars leave it to weaver border punch all along the top.


2. Take your everywhere punch starter kit and line up your first square about 1/8 inch from the punched border to cut your first square. Use the guide lines on the plastic magnetic part to align up your card.

3. Punch.


4. Your square is cut!


5. Line up your everywhere punch next to the square you have cut using the guide lines again and continue punching along the card till the end.


6. Then border punch the opposite side of your squares to create your 'film'


7. Cut a long strip of white card that will fit under your 'film' strip and stamp pictures that will create the 'frames' in your 'film' I have used lawn fawn "critters in the burbs" you can buy them here... http://www.lawnfawn.com/products/critters-in-the-burbs These stamp are one of my favourites at the moment!

8. I then coloured them in with copics using G02,05,07, E02,08,29,37,43,47,49,95, YR00,02,04, Y06,08,17, V000,01,04, BV0000, W1,3 and 0.

9. Double side tape the 'film on the the images.

9.Take some patterned scrapbook paper(i used Bella Weddings paper called wedded) and cut out a DL size piece to match the DL black blank card . Tape on.


10. Take a Bella narrative and place inside the card to write on.( as the card is black)

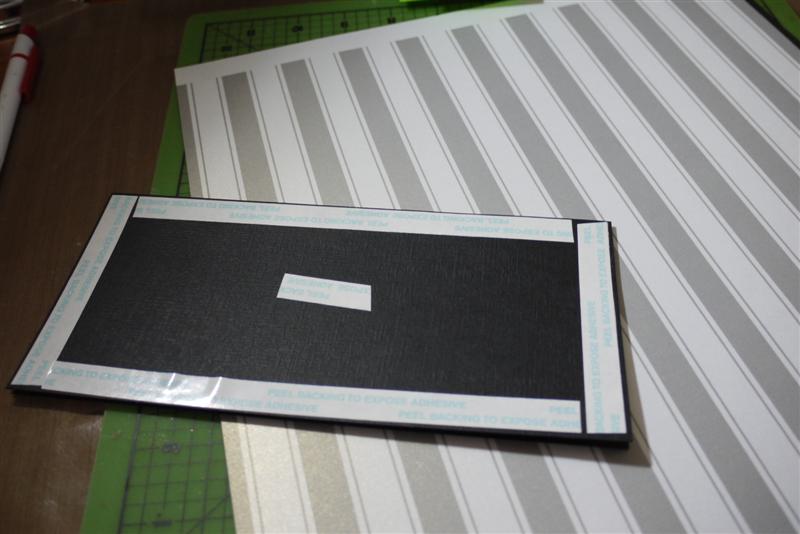
11. Stick the 'film strip' on to your card, along with some Bella gems and a little banner stamped with 'happy days' The stamp is made by MFT stamps set happy thoughts.
You can get them here-

All the Fiskars tools can be purchased from spotlight stores or from http://www.abiscraft.com/

10 May 2011

Sticking Fiskars Punches???

OK....We all have a sticking punch somewhere in the craft stash that you just do not want to throw out.
You say to yourself "I'll leave it for a while and fix it later" secretly hoping that when you come back to the sticking punch that it has fixed itself!
Worry no more!!!
My Mum put me on to a fantastic product..... NO not WD40....that stuff stinks and is greasy forever!
Mum said to use silicone lubricant on my punches. It is what they call a "dry" lubricant so it is not greasy like WD40 and is a million times better than wax paper.
Simply place a few drops on to the metal bit of your punch, press up and down a few times and punch a few times to get rid of any excess lubricant and your punches do not stick any more!!!!
You can buy a spray version from Bunning's (in a can with a straw thing likeWD40) or EK success sell it in a little bottle called Punch Revitalizer.
I have used this stuff on all of my old punches and WOW! does it work well.
No more sticky punches for me!!!!

09 May 2011

Using Fiskar Texture plates in a Cuttlebug.

I was Demoing for Fiskars last weekend at the Sydney Paper Craft Festival and one of the common questions was...."Can I use my Fiskars Texture Plates in my die cutting machine?"
"YES!!!" is the answer.
Here is a Tutorial on how i use my Fiskars Texture Plates in my Cuttlebug.

Firstly you will need the A plate.


Then grab your self a piece of Tim holtz grunge board. I have used card in the past but as grunge board is a little “spongy” it becomes more flexible if you are using card and paper.
I had spot grungeboard but is doesn't matter what one you use as it is just creating the extra thickness.

Then place a silicone mat.
I brought a silicone baking tray from the reject shop for $3.00 and cut it down to fit my cuttlebug...a heap cheaper than buying a one specifically for your diecuting machine.

Then the paper you want to emboss. I have used pearl paper here so you can see the embossing at the end clearly but this “sandwich” works fine for card also.

Next place your Fiskars texture plate the pattern you require face down.
(I have placed down the Peacock feather texture)

Lastly place the B plate from your cuttlebug.
Run the “sandwich” through the Cuttlebug........

........and here is the embossed paper!

I have the fiskars “sandwich” written on the back of my A plate so i do not forget it.

And here is the finished card.
I have used the texture plate my Fiskars trimmer and Fiskars water boundary punch.
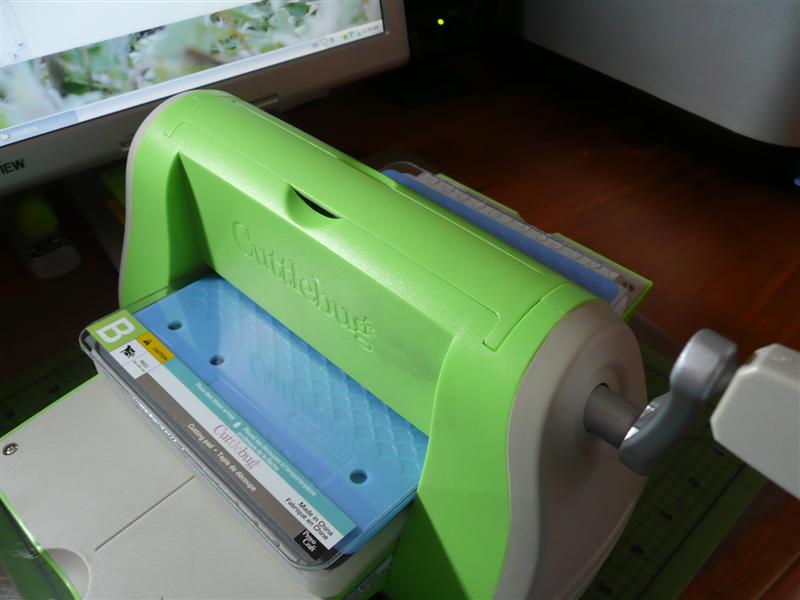
So I hope this helps everyone out there to blow the dust off your old Texture Plates and give them a new lease of life!!!