Hi there everyone!! today I have a tutorial for you on how to create a basic jewelry box in the silhouette Alta software.
1- Open the Silhouette Alta software. Click on the library tab on the right.

2- Click on the library.

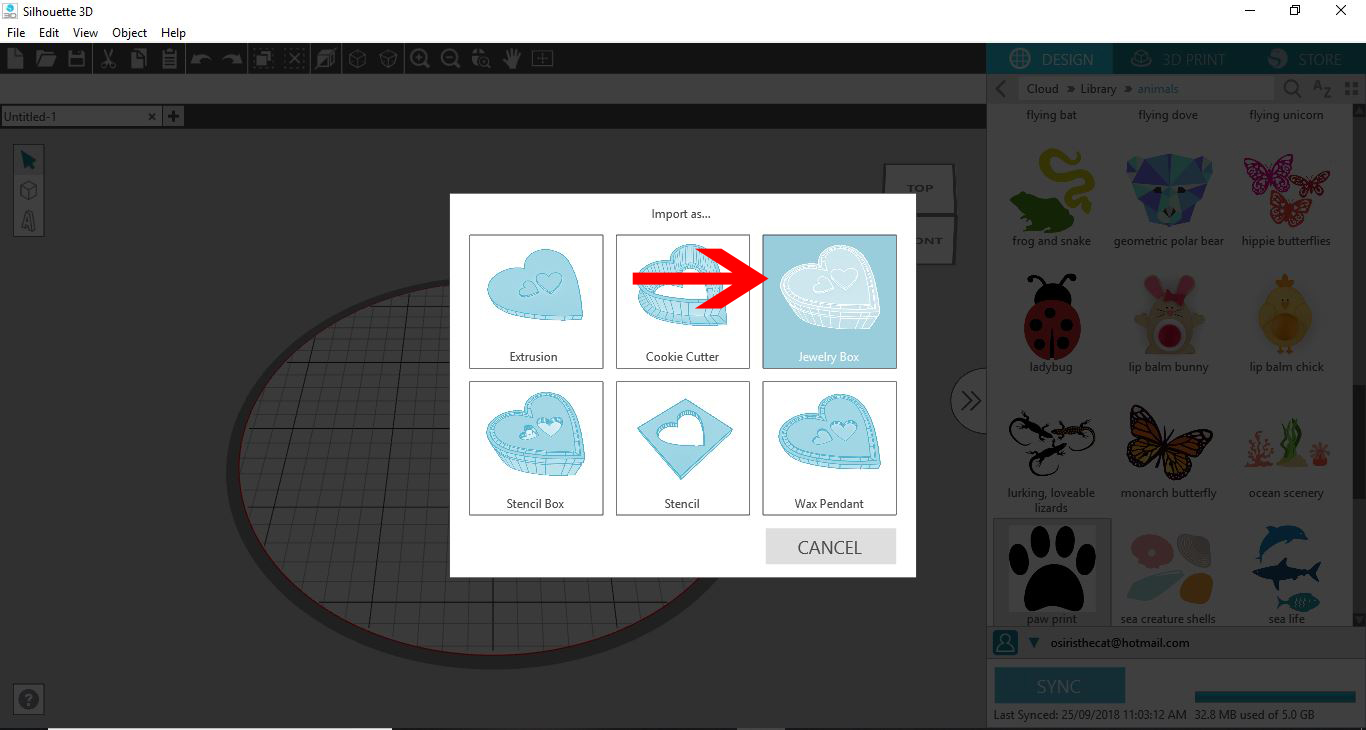
3- Select a basic design. Double click on the design.

4- A new window will appear. Click on the jewelry box icon.
5- Your 2D design will appear as a 3D jewelry box.

6- You can adjust the size of the box using the nodes. You can even adjust the height as well.

7- To adjust individual parts of the box you need to right click and ungroup the design.

8- You can separate the lid from the base.

9- When you click on the 3D print icon, you will see that the printer wants to print the design in many parts. This is great if you would want to have several different colours and to glue them together. If you want them all to print as one file you will need to group the parts in the design area.

10- Select all the parts and right click then group.

11- and now you can see that the printer will print as one part.

12- If you would like to make the most of your design, you can add a base to part of your box to make a separate compartment. Go to the shape icon and select the cube.

13- Place the cube in the design,

14- Adjust the height of the cube to make to thickness the same as the rest of the base area.

15- Select the new base and the original box and right click then group.

16- You can now print the box.


