
*Nothing to Disclose. I am not affiliated with Heidi Swapp or American Crafts.
So this Christmas I decided that if my kids wanted to hand out a bunch of Christmas cards, they would have to make them themselves!
So I thought that a foiled greeting on their hand drawn cards would look cool! And its easy to do!!!!
You will need the following-
Hand drawn picture/image.
scanner
colour inkjet printer (not laser)
laser printer
Cardstock
foil
HS Minc Machine
Software to print with and add text. (i used silhouette studio)
Manual die cutting machine/dies
1- I got my daughter to draw a pic for the front of her cards. You can see the pic she drew below. Then I scanned it into my PC.

READ MORE AFTER THE JUMP >>>>>>>>>
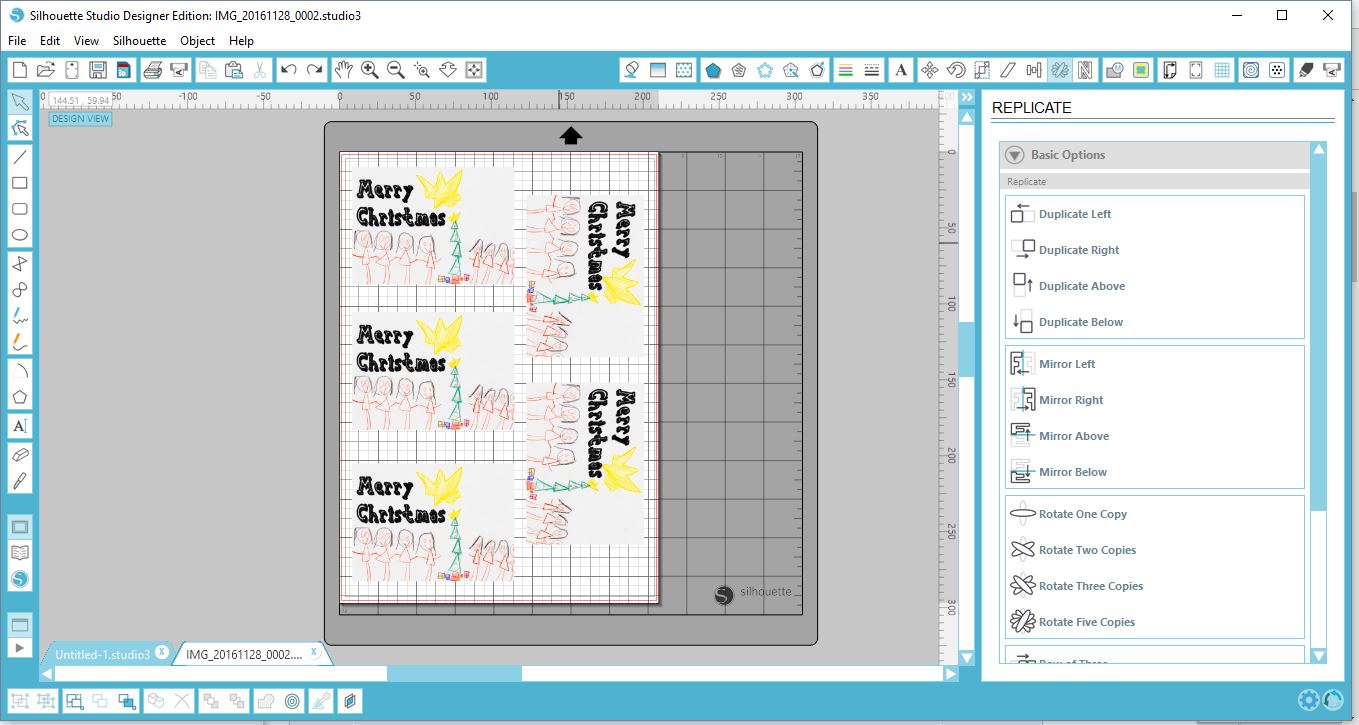
2- Open your software. I am using Silhouette studio, you can download it for free HERE. Open your image in the software and resize the image to the size you would like

3- Type your text for the card.

4- Change the text to the font you would like (i'm using Cupcake Sketch) and adjust the size to fit your image.

5- Arrange your images and text onto your page. Select all of the images NOT the text, and group them.

6- Now select all your text NOT your images and group them separately
.

7- You should now have 2 different grouped files. Select the text and move it off your design space.
Then select Print, and print the images using the INKJET printer. NOT a laser one.

8- You images should print without the text.

9- Once you have printed the images, click on the "Undo" arrow. This will send your text back to its previous place before you moved it off the screen and therefore line it back to where the text should be.
10- Next select the image grouped file and remove from your design space. Insert your printed image file into your LASER printer and print the text in black.
*Note- Make sure you are inserting the card with the image on in the correct direction to ensure that your text is printed in the right place. If you are unsure what the right way is, do a test run and note what way you need to insert the cardstock.

11- You will not have an Inkjet printed image and a Laser printed text.


12- Place your card stock into the transfer folder and cut foil to fit over your text. Place on your text.

13- Run through your HS Minc Machine on setting 3.
*If you do not have a Minc you can place baking paper over your cardstock and foil and use an iron on a med heat. It may not as perfect but does work at a pinch.

14- Take your transfer folder from the Minc Machine ad remove the foil from the card stock. You will see that the foil only adheres to the black laser text not the inkjet image.


16- Die cut your image. If you do not have a die cutting machine you can trim it manually.

17- You now have a bunch of cut images with holo silver greetings on them!

18- Lastly adhere them to a blank card. My daughter did this herself.
To finish them off she wrote in them and handed them out to her teachers
.

Using both a inkjet and laser may seem intimidating but as you can see it is super easy to do!!!
Until next time.....


No comments:
Post a Comment