31 December 2012

Alicia's little shop challenge- anything goes....

Hi there! im here today to share with you a little gem i have come across via facebook called Alicia's Little Shop. this is a great new place to get some fantastic digi images at great prices.

Over the past 12 months Digital images have become the norm in the cardmaking/scrapbooking community. they are a great option for someone (like me) who does not have a great deal of space to store a million stamps.

Alicia's little shop id fairly new and only has a few stamps to offer so far. at $2.80 USD they are a great buy and after printing a few off hey are crisp and clean professional images.

This month Alicia has a challenge for all to participate in. the rules are simple, you have to use one of her images....thats it! and the challenge is open to everyone! Plus the prize is a electronic die cutting machine called the silhouette Portrait. And man i would love to win that!!!

So i have decided to enter the challenge.
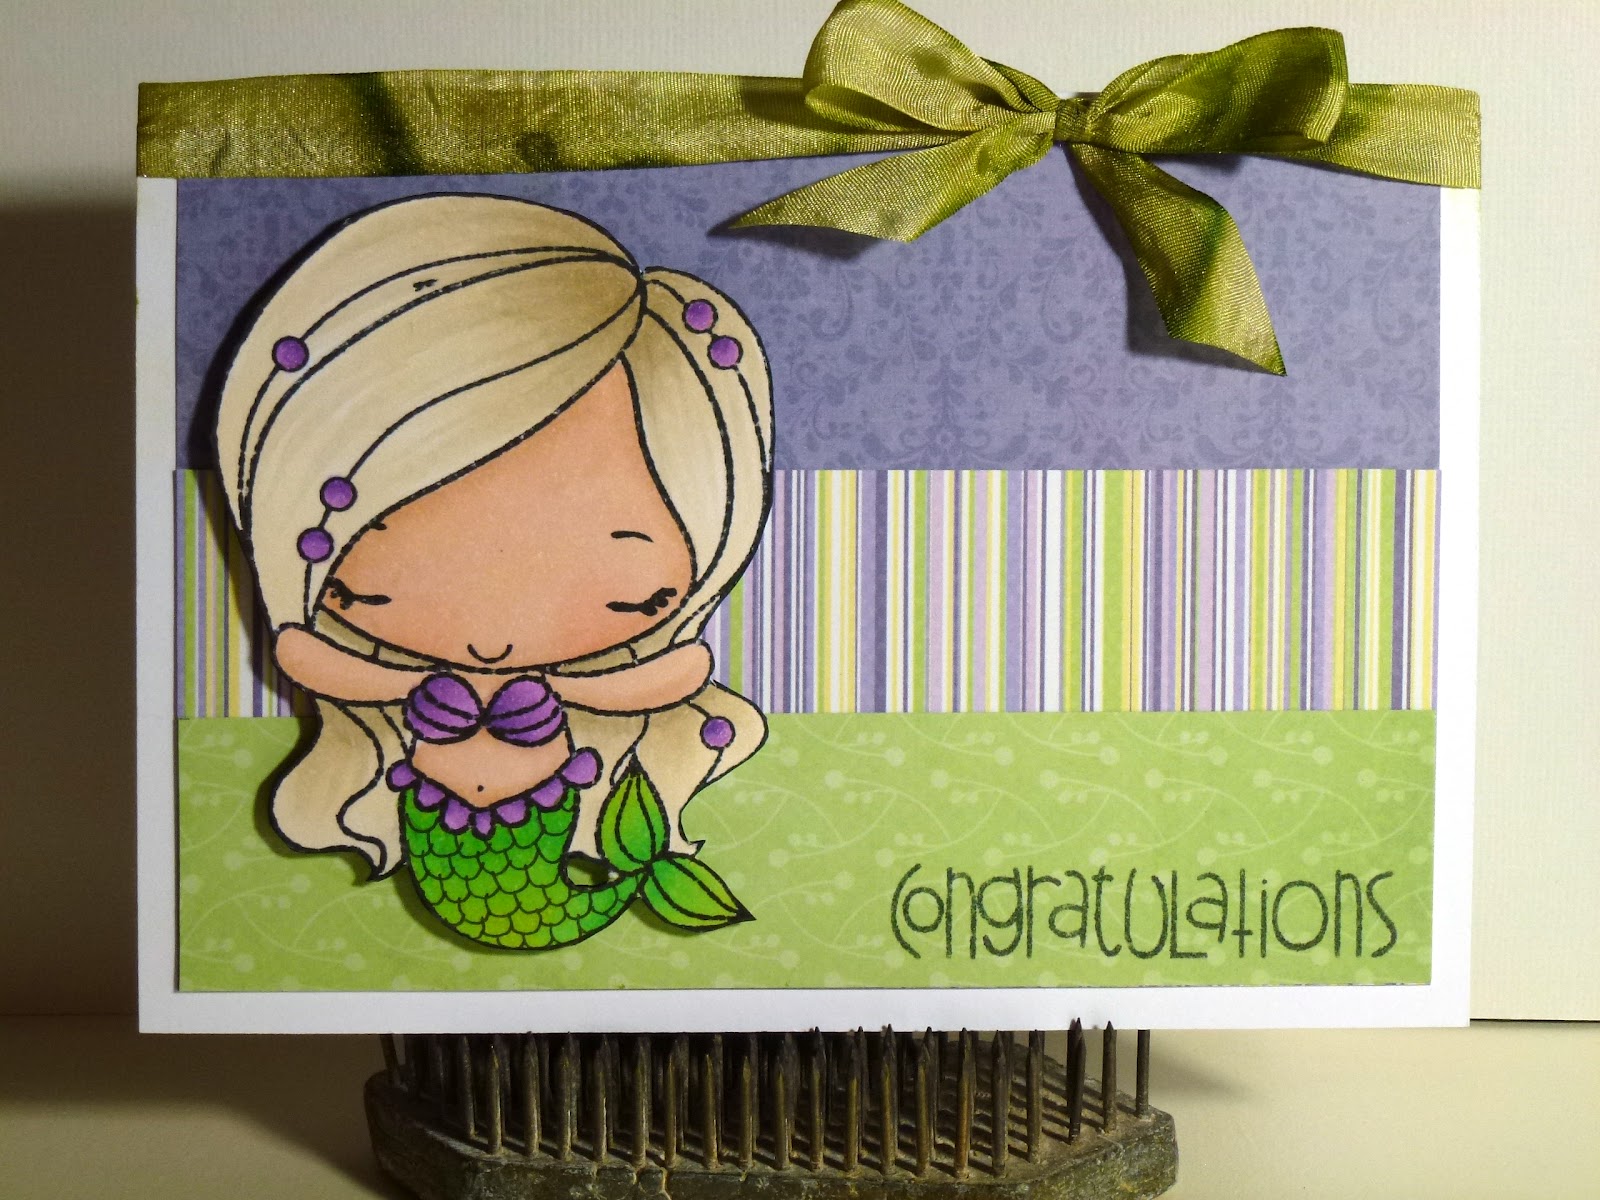
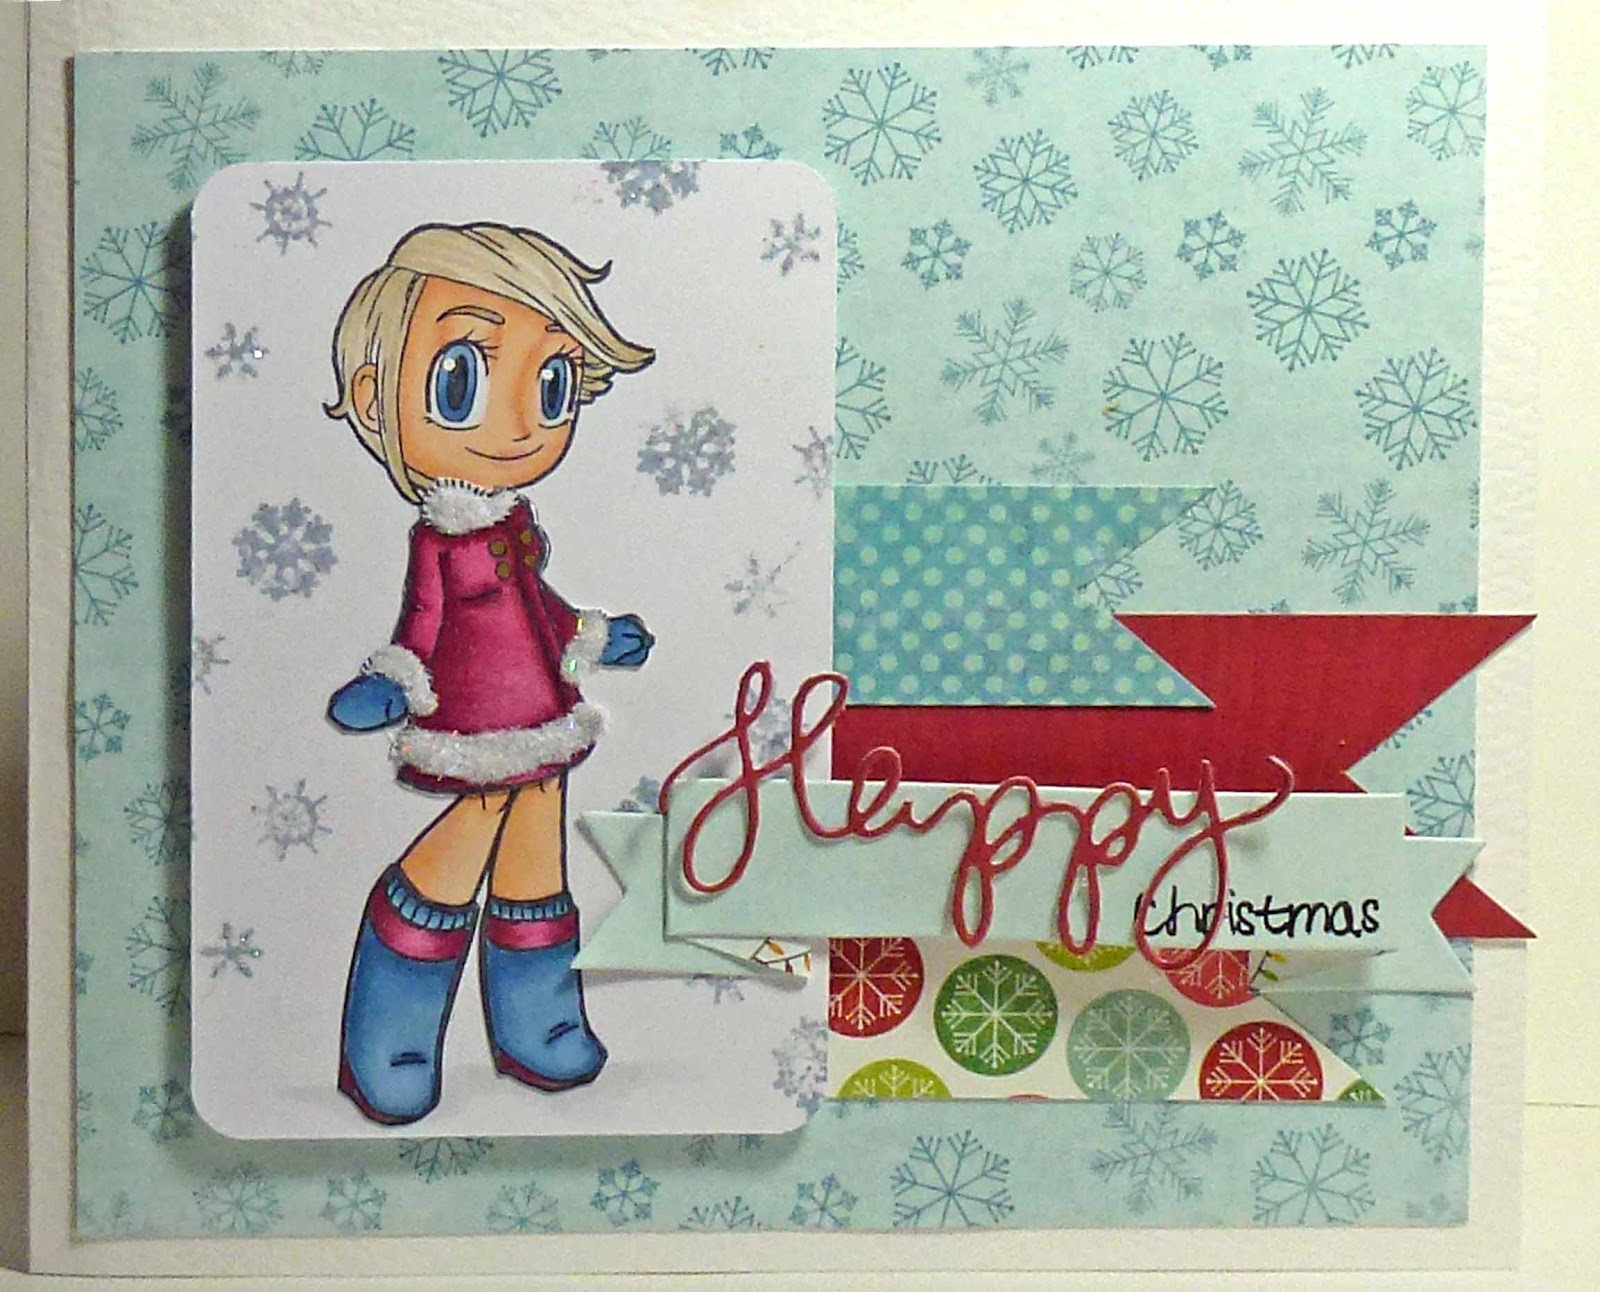
Here is the card i created.


To create this card i used Alicias Honey digital stamp and coloured her in with the following copic markers........

I used a Centre Step card from Downunder Direct then to co ordinate i used Echo Park Everyday Eclectic 6x6 paper pad. I also used my Fiskars kaleidoscope border punch and my rolled roses, royal leaves, and tab dies from My Favourite Things. Lastly i used a sticker from EAD Designs for the sentiment.

I had a lot of fun colouring this image. she is just so cute!!!!

So if you would like to enter the challenge also check out the challenge blog here. The challenge is open till 7th January 2013

Tara :)

23 December 2012

A christmas challenge with Some Odd Girl....

Hello there!
Today for the very first time in nearly 12 months i have decided to enter the Some Odd Girl challenge. The sketch that was provided is below.....


and with this sketch in mind,here is the cards i made.


I used copic markers to colour the image, then of course a Some Odd Girl stamp set... which was my newly purchased Kaylees Closet with the winter warmth outfit stamp set.

I used My Minds Eye papers from the winter wonderland collection. and a simon says stamp die.
If you want to join in the challenge you can enter Here. and the challenge is on till the end of the month.

Tara :)

13 December 2012

An aussie christmas over at mad for markers challenge blog

hello there! how are you all, only a couple more weeks to exmas now and our challenge is right under way!
It was hard to find an "ozzie" theme ofr my card today so instead i did a polar bear and a tag!
here are the colours i used....

and here is the cute little bear from Some Odd Girl winter friends collection .
and then with a bit of this and that, i created a tag for a xmas pressie .


how cute us he!!!!

Also i would like to let everyone know if they want a bargain or two head on over to Mad 4 Markers as Sammi is having a closing down sale going on and all the Some odd girl stamps are 20% off along with a bunch of other stamps and copic markers!!!

Do not forget to enter you card in this months challenge over mad for markers challenge blog!

Tara :)

09 December 2012

Fiskar tools-a plenty in Australian Papercraft Essentials issue 26

Hello there!
Today i wanted to share with you all the current issue (26) of Australian Papercraft Essentials.
I was asked by Practical publishing to do a commission for them in their cut out and keep section. Of course i said yes! what better way to share Fiskars wonderful tools that in a magazine!
I created 7 cards for the magazine and every card used at least 1 Fiskars tool!
I even managed to get one of my cards on the cover of the magazine too!
In total i used over 10 Fiskars tools on 7 cards.
These tools included-
Fiskars Trimmer
Fiskars Fingertip knife
Fiskars Border punches, including groovy rainbows and up in the clouds interchangeable cartridges,upper crest, double bubbles and bubbles.
Fiskars shape express tool and shape template in circles.
Fiskars corner punch
It was great to use all these tools and share some techniques with everyone in theses cards.


IMG (Large)


If you like to know how to make anyof the cards, Issue 26 of Australian Papercraft Essentials is out now in newsagents and retails for AUD$10.95
I think one of my favorite things i made with my tools for this issue was the summer snow globe with my shape express. I'm sure there are a lot of you out there with one in your stash..so why not have a go for xmas and make a card or 2 with a christmassy scene using it!
Tara :)

29 November 2012

ELF! and Y's and YR;s

Hello there! so we are coming to the end of this months challenge at mad for markers challenge blog with the yellows.
This was not an easy challenge especially if you are wnating to make a bunch of xmas cards!
but you can add a bit of Y into your craft cause gold is always good on xmas cards.
And that is exactly what i did!
Isn't she cute! she reminds me of the movie Elf ! As you can she this is an Some odd girl image. You can purchase a variety of Some odd girl stamps over at Mad for Markers.

Here are the colours i used.

and here is the finished card. I also used some kaisercraft papers and 2 fiskars border punches called upper crest and lacy doubles.


 Do not forget to enter the challenge over at the Mad for Markers challenge blog

Tara :)

25 November 2012

A card a day - 7

This card i am sharing with you today. is using a Fiskars border punch called bubbles. It is such a cute design.
P1030470
Took several co ordinating patterned papers and then punched them each using the Fiskars bubbles border punch. After layering them on my cardstock i them stamped my image. trimmed with my Fiskars trimmer and then placed the image on my card. I threaded some red ribbon through the back of the card tied a bow, and the card was complete.
I jsut love making simple cards for christmas. it is great to put a lot of detail into a card but when you are making christmas cards for the masses you want an effective card that wont take you forever or break the bank!
Using a couple of key fiskars tools you can achieve this.
Tara :)

23 November 2012

A card a day - 6

Today i have a great card that even your kids can make this christmas.
P1030471
This card used one of my "can not live with out"punches from Fiskars. THe Fiskars roung n round XL squeeze punch.
I made an car by folding and A4 sheet of card stock then punched 4 circles out of different patterned paper. then using 3D foam dots i popped them onto the card. with a sentiment stamp from a 2011 Fiskars stamp set i stamped the sentiment in red then added some glitter glue.
A quick and simple card for christmas.
Tara :)

22 November 2012

Acard a day- 5

hello there! Well another day and another christmas card. I have really enjoyed putting together some cards ready for xmas.
Here is my card for today. A simple but effective card.

P1030469
To make this card i jsut grabbed an A5 bit of cardstock folded it in 1/2, layered with some patterned paper. then with my Fiskars corner punch i punched the top right corner of my card and the cardstock i used in the middle. I then used a Fiskars christmas stamp i brought for the USA last year and a epoxy sticker. finished it off with some faux stitching and there you have it. A greeting card made in only 5 mins. A great way to quickly make a buch of cards to post out to friends and family if you are short on time.
Tara :)

18 November 2012

A Card a Day - day 4

Today i have used a few different Fiskars tools to make this card.
I love washi tape and with this card i placed washi tape in stripes over the front of the card then punched through both the washi tape and the card stock. I used my Fiskars interchangeable border punch and the lacy doubles cartridge. these are available in Spotlight or your local SSS.
P1030436
I also used my Fiskars extra large round n round squeeze punch to make the sentiment.
I coloured my stamped image and trimmed it with my Fiskars trimmer, and the card was made.
I look forward to sharing my next card with you all!
Tara :)

17 November 2012

A Card a Day - -day 3

Hello there!
My next card is up and i love how this has turned out!

Happy wishes (Medium)
Again a simple card which involved several fiskars tools.
This time i used my Fiskars interchangeable border punch and the X marks the Spot cartridge. You can get the starter pack and the cartridges from Spotlight or your local SSS.
I love how you can lace ribbon through this punch. though if you do not have ribbon you could just cut thin strips of paper and thread them through or even layer onto a different coloured card to give a different effect.
See you soon with my next card,
Tara :)

16 November 2012

A card a Day - day 2

Hello again!
Today i have brought you another simple card for you to make for xmas.
P1030435
As you can see it is really simple to make. i took a 5 inch square card and covered the front with christmas patterned paper. THen stamped an image coloured and cut out with my Fiskars Trimmer. Then mat and layered the image.
Then to add some extra effect, i cut some co-ordinating papers and using my Fiskars Jester border punch made some creative edges to layer the image onto. A couple of stickers and the card was made.
It took no more than 10mins to whip together and if you are making a bunch for christmas this is the way to go. simple but effective.
Tara :)

15 November 2012

Y and YR copic marker challenge with Mad for markers

Hello there!

So i did not know what i wanted to create today until yesterday i received an email from a  friend at Fiskars telling me about another fiskateer and leader who has just been diagnosed with breast cancer
. It was quite a shock because she is a young and healthy person. Anyway a bunch of us at the fiskars blog are getting together to make cards to post to her and i thought i would love to make one and share it with you all here as well as send it to her in America.

Some odd girl has a bunch of great stamps, which you can buy at Mad for Markers. this particular image is actually a digital image but i had to use it as it has the Breast Cancer awareness ribbon her dress.


As you can see the Y and YR colours go great with the pinks!.

here are the colours i used.


I really hope she likes the card.
You can enter the challenge for this colour combo over at Mad for Markers monthly challenges. just link your pic in the right sidebar.


Tara :)

A card a Day - day 1

I am really excited with the Card a Day this month.over at the Fiskars blog It is a great way to get all my xmas cards done in one go and also share them all with you.
Today's card i have actually made to use as a gift card on a pressy.
It is a very simple use of some fundamental Fiskars tools.
P1030434
This card was made by cutting an A4 piece of card stock to a 5inch square card. i did this using my Fiskars trimmer.
Then i stamped coloured ,then mat and layered the image using my Fiskars trimmer again.
Lastly i use one of my Favorite Fiskars border punches called Upper Crest. You can buy this Fiskars punch at most Spotlight stores or if you cannot get to one be sure to ask your local SSS to get one in for you. This punch has so many uses i love it!

Tara :)

12 November 2012

Getting gifts ready for Christmas- plushies.

Christmas is only just over a month away...i know right!!! can you believe it! and as this year i am trying to be a bit more creative with my pressies i thought i would make some plushies.
One of the exciting things i have taken part of this christmas is a Secret Santa over at a Facebook group i am involved in called Aussie Nails. this is a group of Aussies Gals who love to collect nail polish and well basically be addicted to nail polish. I am one of these girls! so with out Secret Santa due to be posted in a couple of weeks i wanted to make something really special for the parcel. We have a $25.00 limit which really does not buy you a whole lot of polish, so with this in mind i thought i would make my Secret Santa a nail polish bottle plushie!. Yep you heard right! a Giant bottle of nail polish.
Here is my inspiration.
Guymeetsgalveston

And here is the finished plushie.
P1030430
I Started out with this plushie by making the pattern. This involved many of my Fiskars tools!
To make the pattern I used a large bowl to make the semi circle for the bottle with my Fiskars shape express and circle templates to make the top of the bottle,the bottom of the bottle and the top and bottom of the lid. I also cut out a white circle with my shape express for the label on the bottom of the bottle. it have to be true to life right?!

P1030416
I then cut everything out with my Fiskars scissors.
Once cut out i hand sewed the label with secret santa and a bar-code on to the white felt. then sewed it onto the base of my bottle felt.
P1030418
I then punched out felt letters and had stitched O.P.I on to the bottle front along with all the other writing on a OPI bottle.
P1030417
Next i made the lid. i machine sewed the felt together then hand stitched the gap once filled with stuffing.
P1030419
I took the lid and sewed it to the top of the bottle piece of felt. Then joined all the bottle pieces together turned the right way in and filled with stuffing.
P1030420

I sewed up the hole i filled with and it was made!
P1030428
P1030429
Cute huh! The bottle stands 25cm tall and looks almost like the real thing. It only took a couple of hours to make and i am sure my Secret Santa will love it!
Tara :)

18 October 2012

This month is multi liner madness over at the mad for markers challenge blog.
 And i think i must have been mad to offer my multiliners to help my daughter Zoe with the pictures. Like in my last post, my daughter is an avid drawer. She always has he head in a sketch book creating cartoons or drawing different characters from TV and movies.
And yesterday was no exception. she came home from school, did her homework and started to draw. When she was finished she asked me "Mum, will you trace this for me?"  "sure"i said i will do it tomorrow.
So today i grabbed my trusty multiliner and traced her picture so she can colour it in when she gets home today.
Isn't that what mums are for?..... using their treasured markers and multiliners for their kids???
well mine are so here are the results.

The image is all finished now and awaiting Zoe to come home from school and colour it!

Arn't mulitliners great!

You can buy yours at the Mad for Markers store, once you have them, why not enter the challenge at the Mad for Markers challenge blog!
good luck!

Tara :)


07 October 2012

It is WORLD CARDMAKING DAY !!!!

Hello there everyone! its World cardmaking day!!!!! well pretty much the whole weekend so i thought i would share with you all some card making spam.
Here goes.........


 A cute xmas card using several different Lawn Fawn stamps. you can purchase Lawn fawn from Jay Gee's Nook here in australia and from Lawn Fawn in america. Other little things used for this card were Copic markers, distress inks,Echo park papers and memory box dies.


This card is using another one of my Fav stamp brands called paper smooches. you can get them over at  Jay Gee's Nook in Australia and over at Paper Smooches in America.


Another card using Paper smooches Washi tape and a My Favourite thing die-namic die.


You cannot go past some odd girl stamps! They can be purchased from Some odd girl herself or if you live in australia they are available from Mad 4 Markers or Jay Gee's Nook. and to complete this card i used the Fantastic Fynmark Bella! range of papers. these are available from Spotlight here in Oz.


Another cute card using Lawn Fawn stamps.


And another with Lawn Fawn! plus one of my Favourite punches from Fiskars!!!


 Below and above are 2 cards made with stamps from My Cute stamps i love these sets!!!


There are a lot of blogs celebrating World cardmaking day. Moxie Fab World, and paper craft connection are 2 of the big online celebrations ...so go and join in!!!!

Tara :)

04 October 2012

the many uses of multi-liners

hello there!
 this morning i have a few things to share with you that i have used multi-liners with. and for this post, i also enlisted the help of my daughter Zoe.
She is an excellent artist. she can just look at something from a movie of an object and just draw it. for 11 years old i think that's great.
While i coloured some images in to share she went and drew a few draw pics and then used a black 0.3 multi-liner to trace what she had drawn.

Here is what she drew and used the multi liner for.


and while Zoe did this above, i stamped a few onesies from the greeting farm build a onesie set. With my black 0.5 multi-liner i dres some stripes circles and patterns on it to show you all how you can add character to a plain image.
The multi-liners come a great range of colours. not just black and they come in several different styles. you can get re fillable ones,just like your copic marker or you can buy the disposable ones they are a lot cheaper but once they run out you need to re buy the whole thing again.
all of these choices can be found at the mad for markers store

do not forget to enter the challenge over at the mad for markers challenge blog

Tara :)

21 September 2012

Zoe is a viking!

hello everyone!
you can make more than cards with Fiskars!......i made a viking!
Astrid from how to train your dragon to be exact.
Zoe had her book week parade today and the theme was Champions. So Zoe decided she would go as Astrid. she is a Champion in the book and the movie for helping save Toothless the dragons life.
And with anything i seem to make or create, my Fiskars tools come out in full force to help me out.
Here is a pic of Zoe's costume.
P1030005
First up were her boots. To make these i took an old pair of uggs and some fur fabric, then using my Fiskars rotary trimmer cut the fur to fit the tops of her boots. And of course i used my Fiskars Cutting mat!
Next up were Zoe's shoulder pads.
P1030008 copy

To make these i used my Fiskars trimmer to cut 1 inch bits of silver card stock.When i had enough i put them all together and used my Fiskars sprung loaded hole punch and setters. They are great if you do not want to use a hammer. Then i just popped a brad though and fanned the card out. add a skull and done!
Last was Zoe's Viking skirt.
P1030010 copy
This used quite a few Fiskars tools!
I used my Fiskars trimmer and Scissors to cut the panels, then Zoe took the small circle squeeze punch and cut out a bunch of silver circles to glue on the panels. To tie all the panels together to make a skirt i grabbed my Fiskars leave it to Weaver border punch and punched the top of all the panels then thread through brown ribbon to tie it all together.
What i thought was going to be a nightmare to make was so much easier with a few Fiskars tools.
When you think of your Fiskars tools sometimes if you think outside the box you will see another 100 uses for them like i did today!
Tara :)

20 September 2012

Mad for Markers g and YG challenge

hello everyone!
todays post is a little late due to computer issues but i have for you today a cute little greeting farm image to share.
I actually coloured one of the new äs the crow fly's"images for this post but a certain cat.......yes you know its you Loki.....walked over my desk and spread all sorts of yuck over everything i was doing! ink and paw prints everywhere!!! silly silly cat! lucky it was not staz on...that would have been a BIG clean up!!!!
anyway here is my card!
to colour this card i used  the following copic markers.....

E50,42,43 for the hair
V12,15,17 for the top and beads
YG 03,06,09,g14, for the mermaid tail
R00,E11,13,RV32 for the skin

so head on over to the Mad for Markers challenge blog and have a go!

Tara :)

06 September 2012

Green challenge over at mad for markers!!!

Good morning everyone!
 i am loving this months challenge over at the Mad 4 Markers monthly challenge blog
 Green is my number 1 favorite colour.

So i thought i would get my Some Odd Girl Stamp set- Gwen in bloom and make a bright and cheery card for you today.

 I have created with this card the Gwen in bloom stamps set, which you can find Here. Then i coloured her with the following markers.....

Skin- E000,00,02,R02
Hair- Y21,E31,35
Clothes- N5,YG94,99,G12,82,85,99,
Flower- YR000,00,02,G85

i finished her off by cutting her out with a die, then layered her on my card. added some twine and a sentiment ans the card was finished.

Do not forget that there is a sale going on over at MAD 4 MARKERS with discounts off sketch and ciao copic markers. it is a great time to buy. just click on the link!!!

Do not forget to enter our monthly challenge over on the right hand side bar!!!!

Tara :)

23 August 2012

Anything Goes over at Mad for Markers!

As Christmas is on its way i thought i would share with you a cute little card that i made up ready for this xmas.
I used a cute little Some odd Girl Image which i purchased from Mad For Markers


For this card i used........
 E00,02,11-skin
E30,31,55 - Hair
B93,95- Eyes
G21,28,29, R22,24,27,29 at you spica in gold -Dress ,shoes and clip

Do not forget Christmas is only a few months away ...so get started on making those christmas cards....and while you are at it....why not enter one into our anything goes challenge this month over at the Mad for markers challenge blog

Tara :)

09 August 2012

winner of the copic B,BV challenge!

good morning everyone, I have been totally slack with posting the winner of my challenge.With kids sick and a bunch of other things that have come up i had this post in my drafts for like a week now!!!
but without further ado here is the winner!!!!


MELISSA OVER AT NEEDFUL THINGS


Congratulations Melissa! to claim your prize please email me at oirisandloki (at) gmail (dot) com in the next week or so.

Tara :)

22 July 2012

Making Gumball


My daughter poppy just loves the cartoon - The amazing world of Gumball on the cartoon network. She will sit there for an hour and watch the show! Her favorite character is Gumball which is a silly blue cat that goes to high school and is always getting into trouble with his brother Darwin the fish...i know weird huh! but the kids are crazy for this show!!!
Here is gumball and Darwin.

Gumball-and-Darwin-the-amazing-world-of-gumball-21997702-900-548

I have looked high and low for the toys to buy Poppy but apparently they do not make them, so i thought i would make Gumball for Poppy.
I went to my local spotlight store and brought a bunch of polar fleece material. in total i needed about 1/2 metre to make a 46cm toy.
Then with my Fiskars Pinking shears i cut out the fleece. I made sure i cut out it with the wrong side of the fabric as the "right side"as i want the fluffy bit to be his fur.
Pinking-Shears_product_main

P1020534

As you can see in my picture have sewn several colours together before cutting Gumball out. this is so his clothes are incorporated in to his body...less for Poppy to destroy!
Once i had done this i cut with my Donna Dewberry fabric scissors some felt eyes mouth etc for Gumball.

Donna-Dewberry-All-purpose-Scissors-8_product_main


Then i hand stitched them on to his head and added eyebrows and whiskers.

P1020535
 
Next i sewed together, his arms,legs ears and tail. I put stuffing in the limbs and then joined the back half of Gumball with his tail making sure all my colours lined up.

P1020536

I joined up the front with the head,ears,arms and legs. then pinned him together and ran him through the machine all but the bottom there his tail was so i could stuff him.
I stuffed Gumball( i use old pillow filling. when a pillow has run its course i wash them and keep them for stuffing) and hand stitched the opening shut using a ladder stitch.
And here is Gumball.

P1020537

P1020538

He does not look too bad! and Poppy loved him when i gave it to her this morning!
I got the basic pattern from Elfpop it was just a cat pattern for $10.00 and then i changed it up to make gumball. 

Tara :)