26 July 2017

Silhouette V4 Software New Layout Part 3


The New Silhouette V4 software has been released and there are a lot of changes with the layout. This is part  of three several tutorials showing where all the common functions are now located.
I am using the Designer Edition to run through the new layout.
1- In the top toolbar section there is a middle toolbar section that changes dependent on what icon you have selected in the left toolbar.
The standard options in this part of the tool bar is as follows-


2-  The first icon will let you know what options are available to use dependent on what icon you have selected in the left toolbar (1), Fill colour (2), Line color (3), Line style (4).


3- The next section of this part of the toolbar is your height and length there is also a option to lock and unlock the size dependent if you need to keep the aspect ratio (1). you also have the option to adjust the placement of your image on the design space(2).


4- In the 3rd part of the toolbar you have Group(1) and ungroup(2) options. You also have Send to front (3), send to back(4), bring forward(5), send back(6), weld(7), offset(8).


5- Lastly we have duplicate(1), delete(2), centre images(3), centre(4), horizontal align left(5), horizontal align centre(6),horizontal align right(7),vertical align below(8), vertical align middle(9)


22 July 2017

Silhouette V4 Software New Layout Part 2


The New Silhouette V4 software has been released and there are a lot of changes with the layout. This is part two of several tutorials showing where all the common functions are now located.
I am using the Designer Edition to run through the new layout.
1- Select tool.  Is the the same as the V3 software in the top left.


2-  Edit points. We now have a icon for edit points. This is a great new option where you can select any part of your design then select the edit point icon. When selected in the top toolbar all your options will appear that use to appear in a pop up box in V3.


3- Line tool. All the line tool options are now located in one icon. When you hover your select tool over the line tool a pop out box will appear with all the line options you can select. These were previously separate on the left toolbar in V3.


4- Shape tool. All the shape tools are now located in the same icon. Hover your select tool over the shape tool and a pop out box will appear giving you the option to select different shapes.


5- Draw tool. This includes draw freehand and draw smooth freehand.


6-  Then next 4 icons in the left toolbar include Text (1), Eraser tool (2), Knife tool (3), Transform property tool (4). Each of these tools when selected, their properties will now appear in the top toolbar rather than a pop up window like in V3.


7-  Next there is a top tool bar. Here you will find basic functions you will need for use with the silhouette software.

1- New Document
2- Open document
3- Save
4- Print
5- Cut
6- Copy
7- Paste
8- Undo
9- Redo
10- Select all
11- Deselect all
12- Select by colour
13- Zoom in
14- Zoom out
15- Drag over a shape to zoom
16- zoom in and out using the mouse
17- Pan using mouse
18- Fit to window
19- Design space
20- Silhouette store
21- Library
22- Send to silhouette.


18 June 2017

Silhouette Version 4 Update Overview Part 1

Hi there Everyone!!!!!

The new software has been released for Silhouette. Most of the new features are amazing and i was super excited to check them out.
Some of the new features are only available for the Designer version and Business version. But the basics are all available in the free version.

I know a lot of Silhouette owners are concerned for the new major update, but rest assured it is well worth the update.

I would recommend to back up your files and I will post a tutorial on how to do this soon.

For this rundown I am using the Designer version of the software.

1- Page Setup. Now located in the right toolbar. The functions are the same as V3. Note that the page options are now located in this same section and shown as a grid icon. The registration mark options are also now located in this section also, located next to the grid icon.


2- Pixscan. The second icon in the right toolbar. Here all the picscan options are available the same as V3.


3- Fill. The fill icon now includes fill colour (1) Fill gradient (2) and Fill pattern (3). The functions have not changed.


4- Line Style. Line style (1) and line colour (2) are now located under the same line icon. The functions are the same as V3.


5- Trace. The trace function has changed a fair bit. You now have the choice of basic trace (1), colour trace (2) and magnet trace (3).


6- Image Effects. Now are all found in the same icon. Grey shade (1), colourize (2), Brightness.contrast/saturation (3), Gamma (4), Invert (5), sepia (6), Tint (7), Shadow (8).


7- Text Style. Currently this has not changed apart from the location of the icon. In a new update there will be new changes including a glyph function.


8- Transform. This now includes several other icons from the previous V3 software. Align (1), Scale (2), Rotate (3), Move by (4) horizontal shear (5).
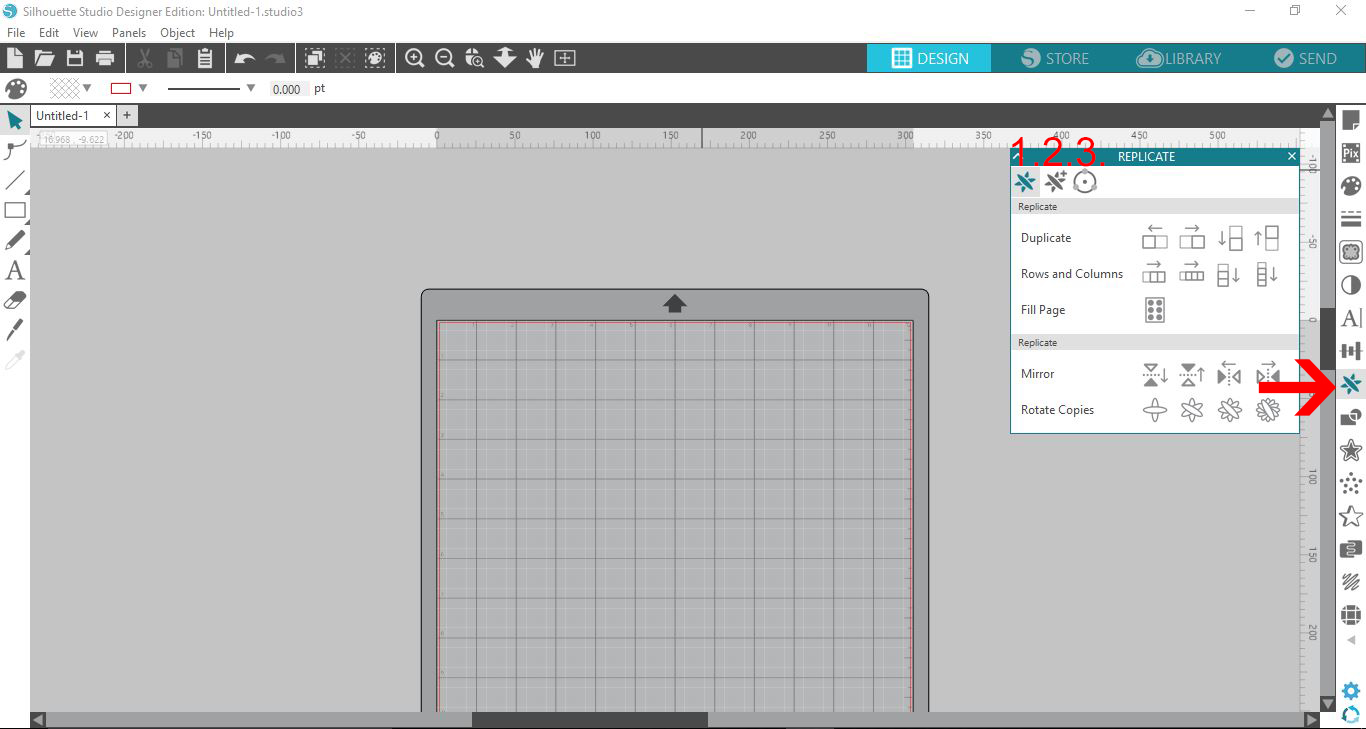

9- Replicate. The replicate option had not changed (1). You now have a separate icon for number of copies (2) and a new object to path option (3).


10- Modify. The modify option is exactly the same as the previous version.
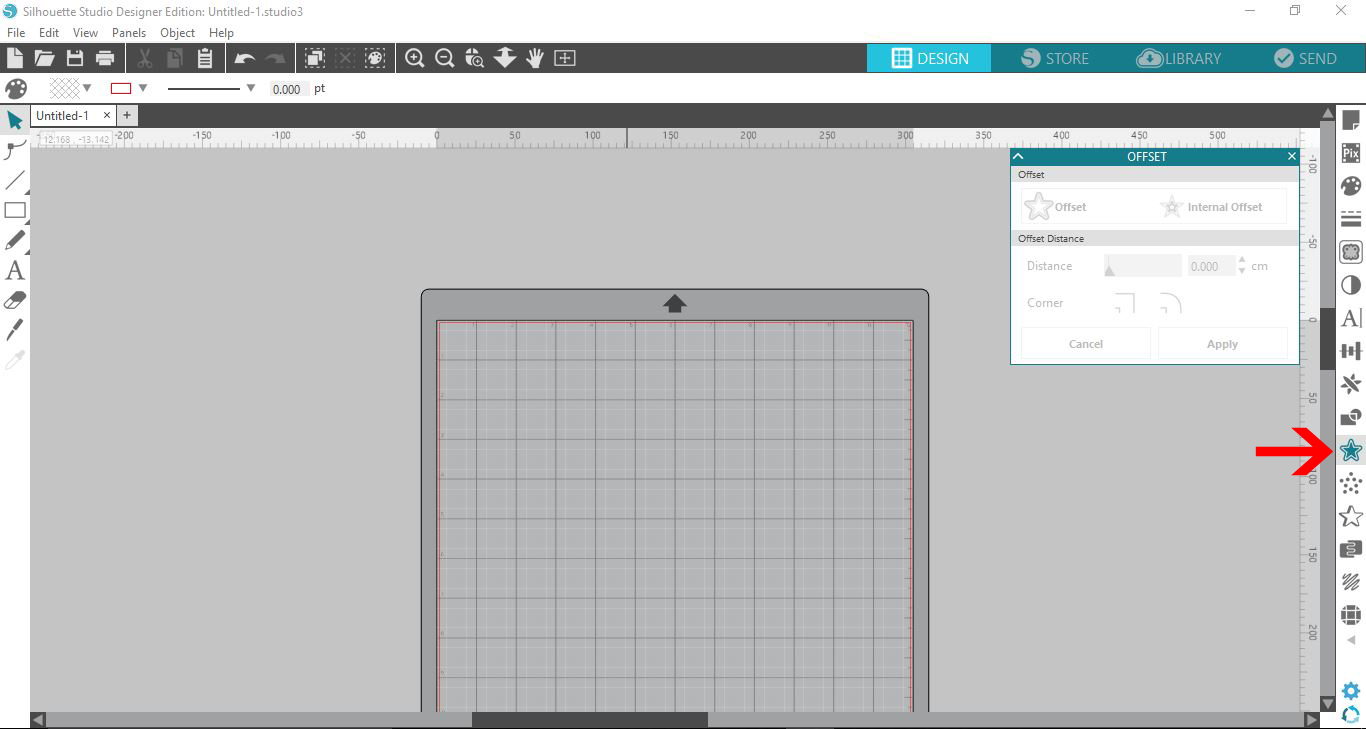

11- Offset. The offset icon has now moved from the top toolbar to the right. The options are the same.


12- Stipple. We now have a whole icon for stipples. You can use the options To draw an shape and add a stipple effect. You can also use the print stipple option to draw the stipple option.
you do require the Silhouette Cameo 3 or Curio machine for this option.


13- Emboss. This function is specifically for the Curio machine.


14- Nesting.  This is a great new function where you can add your designs select them all and by selecting the nest option it will rearrange your images to best fit your page area.
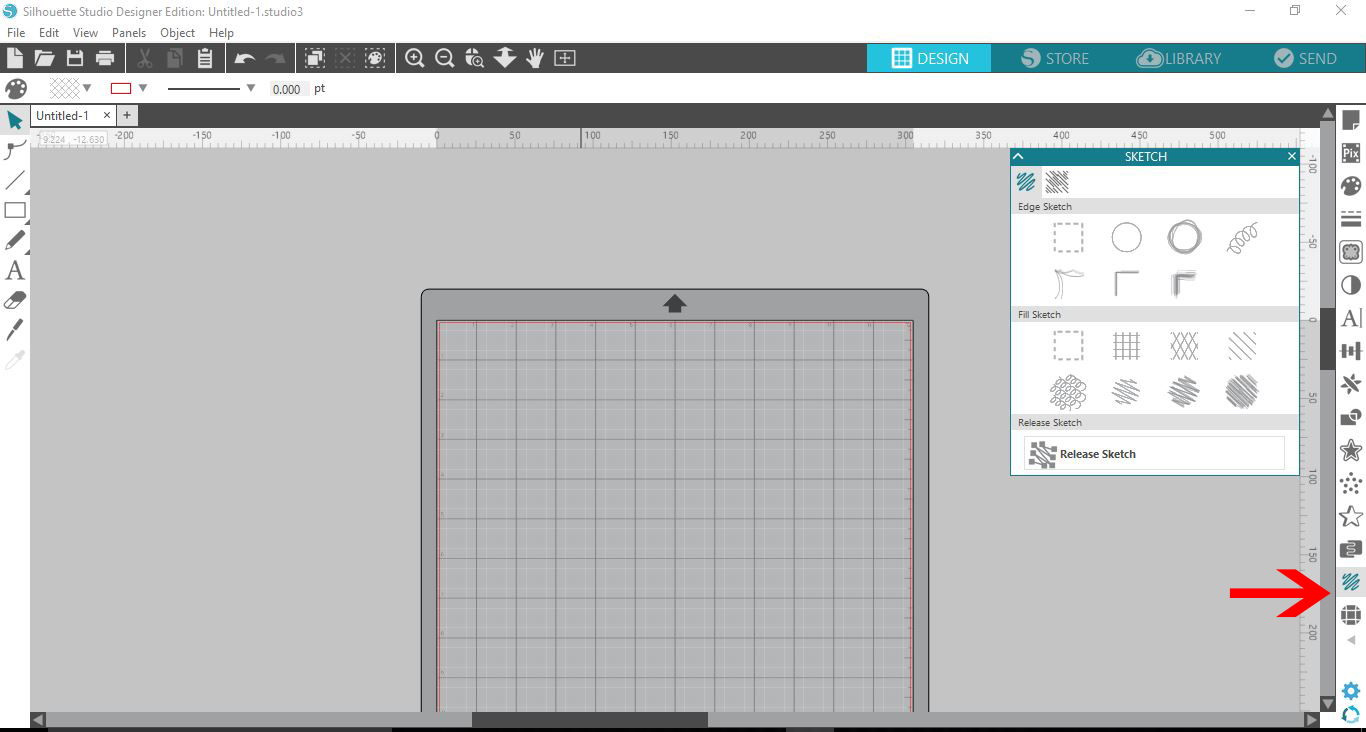

15- Sketch. This Is the same as the V3 Sketch function but with an new advanced option where you can have more control of the sketch you choose.


16- Rhinestones. Has the same function as V3.


17- Layers. By selecting the little right arrow, this will bring up the layers icon. This new function you can adjust and select your layers.


Most of the icons are the same or have been combined into one icon. The majority of top and left icons in V3 have now been added to the right toolbar.

I will post part 2 of the silhouette changes in the next few days

Until next time........


13 February 2017

Paper Smooches February Card Challenge.


Hi there everyone!!
Today I decided to check out the Paper Smooches February Challenge I love Paper Smooches stamps and dies and own many of their sets, some dating back to when the store first opened.
The theme for the challenge is love. I thought about using their banner (above) as my inspiration but there was the cutest cactus stamp in the Paper Smooches Comforting Hugs stamp set that I totally wanted to use!!!


So what did I use for my creation??

Paper Smooches Comforting Hugs Stamp Set
Paper Smooches Linked hearts Die
Paper Smooches Smooches Die
Paper Smooches Tiny Hearts Die
Doodle bug Design Fun in the Sun Paper Pad
Cardstock - white, hologrpahic silver, black, pink glitter and metallic red.
Tape runner
Copic markers
Wink of stella clear marker


I love how my card came together, bright and colourful sending love, but not too over the top with the Valentines theme!!!


I hope you love my creation. Make sure you check out everyone elses creations too over at the  Paper Smooches February Challenge

Until next time......

04 January 2017

Simon Says Wednesday Challenge Anything Goes.


Wow! Its been forever since I did a challenge, I spend so much time freelance writing for craft magazines, writing tutorials for Fontbundles.net and looking after the kids, it feels like I never get time to create just for creating sake! everything I seem to make is for work.

But with the school holidays here and my hubby is off for a week I have finally got a bit on "Me" time and thought I'd enter a challenge!!!

So this week I am entering the Simon Says Stamp Wednesday Challenge .
This week the challenge is Anything Goes with a spotlight on Lindys Stamp Gang products. I swear I owned some Lindys Stamp gang spritz, but I cant find them :( So I had to improvise and use a few other brands of spritz instead! Tho I will be purchasing their spritz after seeing some of the great cards made with the unique colours!!!!

I'll post a quick tutorial of what I did to create this card.


You will need the following-

Blank card
Cardstock - copper, black glitter, gold glitter
Watercolour paper
Sequins
Spritz - Distress mica spray-antiqued bronze, sheer shimmer spritz-gold
Stamps - Sweet Stamp Shop- Birthday sentiments, Inkadinkado - 60-01220 (geeky cat)
MFT Dienamics - Chevron stripes
Adhesives- Tape runner, Multi matte medium,foam tape
Coloured Pencils
Black ink - Ranger Archival Ink


1- Stamp your image on watercolour paper and trim. Place on a mat or somewhere safe to spray with your ink. I used a old cardboard box.


2- Spritz with the Copper Spray. Let dry (or heat dry) then spray with the gold spritz. Let dry.


3- Once Dry, colour in the image with pencils. I wanted a subtle look on the kitty so I only used lighter colours and blended them a little with grey/fawn pencil.


4- Once coloured, Layer on black glitter cardstock, then cover your blank card with copper card.
Die cut your gold chevrons and place onto your card. Adhere the image onto your card with foam tape. Add sequins.


The card took me under 20 min to make!
I love how spritz can give your cards a great shimmery look but at the same time does not detract from your stamped image.

Make sure you check out everyone elses awesome makes for this challenge!! I really enjoyed creating just for fun rather than work!!!

Until next time.......