Today In the Foiling series I will be sharing with you how to use Microsoft word to create text to foil.
There are lots of software programs out there to use for printing text. One that most of us have on our PC is Microsoft word. This program is good to create basic text to foil.
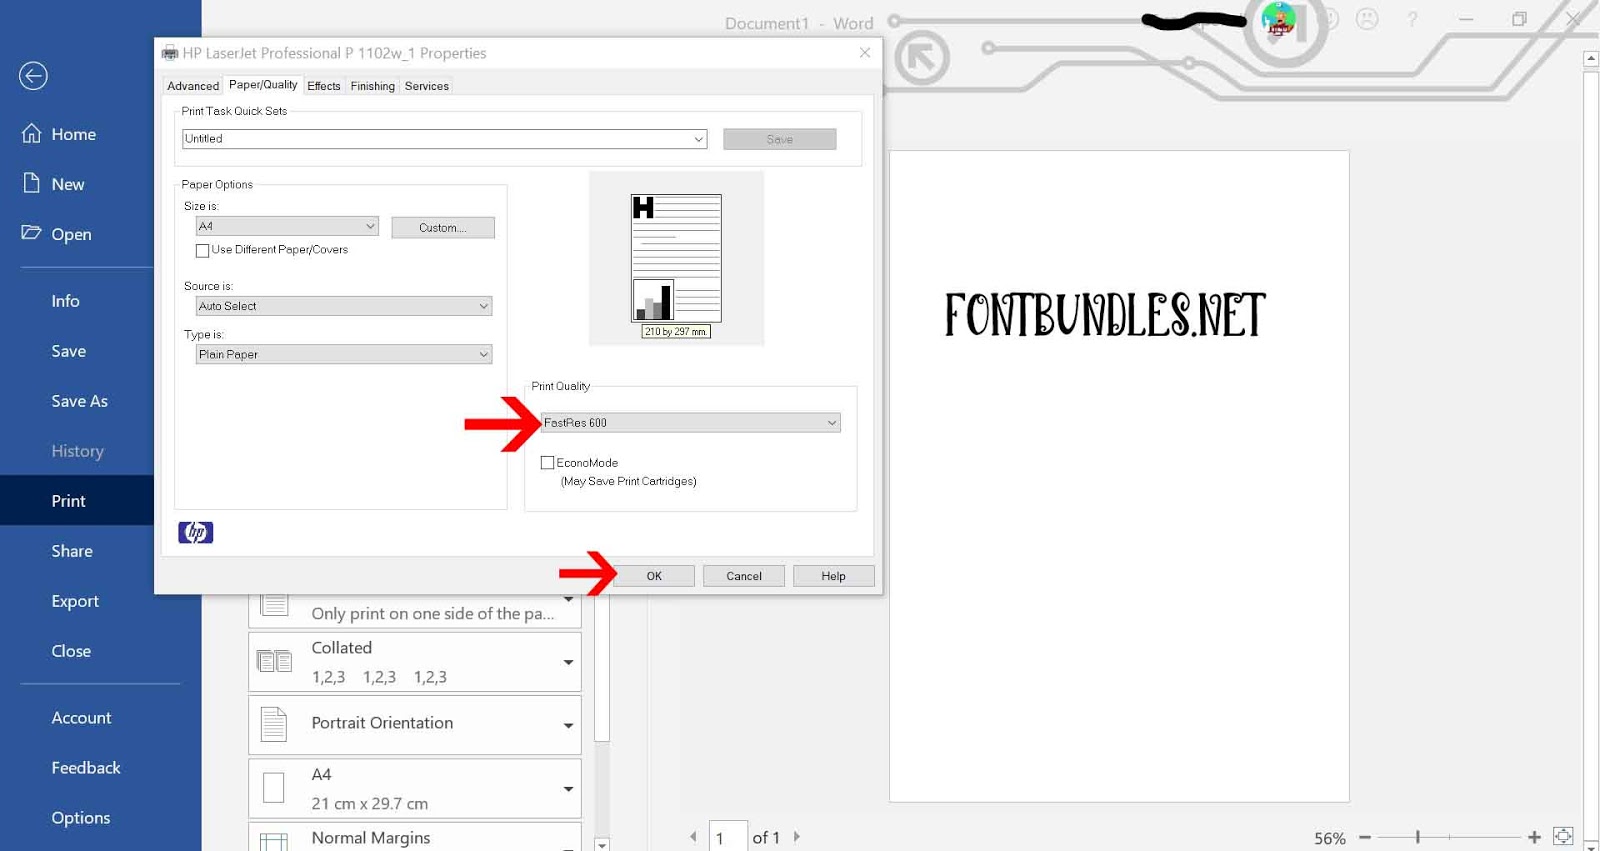
It is good to note tho that with a lot of Microsoft programs the software will automatically change your print settings to eco mode. When foiling, you will need to remember to change that setting back to best print setting so you have the amount of toner printed that will work well for foiling.
This tutorial will show you how to crate basic text and foil.
1- Open Microsoft word. To change the font select the font dropdown menu.

2-Select your font. I am using Broomstick font from fontbundles.net

3- Type your text. Next change the size of your font to your needs.

4- Click file to take you to the print screen.

5- Once your printer is selected, click on printer properties.

6- Make sure your printer is on the highest quality setting so the most toner will be printed. Click OK.
7- Print your text onto your media.

8- Place the card into the Heidi Swapp minc transfer folder with a piece of foil over the printed design.

9- Turn on your minc and set to 3. Let the minc heat up until it beeps. Place the folder into the machine. It will slowly feed through, heating up the toner and letting it adhere to the foil.

10- Once the foil has cooled, slowly peel it off your design. The foil will have adhered to the toner creating a foiled finish.


No comments:
Post a Comment