You will need the following-
Coloured paper around 80-100gsm so it is a little stiff.
Fiskars round -n- round extra large circle squeeze punch
Fiskars round -n- round large circle squeeze punch
Fiskars May Flowers medium squeeze punch
Fiskars Bling extra Large Squeeze punch
Glue dots
Stapler
Ok . now lets get started.
Cut yourself 7 Red circles with your extra large fiskars circle punch.
Next fold each circle in a concertina shape back and forth.
Then you will need to cut a small slit along the middle edge of each circle in the same direction as the folds. approx 1-1.5cm
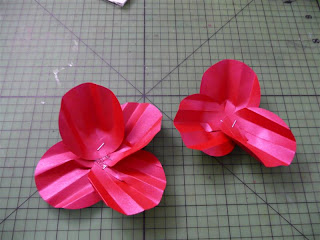
Next over lap the paper cut you made slightly so you have a slight curve. Staple. It will start to look like a petal now.
Glue dot four of the petals together slightly over lapping and then do the same with the other three. this will make your 2 layers of your poppy.
Once this is done place a glue dot on the centre of the four petal part and then place the three patal part on top. Try to alternate the leaves so there is no gaps.
Now we have to create the Poppies centre. Take your yellow paper and cut out 2 shapes with your Fiskars bling punch.
Glue the 2 on top of each other alternating the long strips so it will create the stamen. then place in the palm of your hand, take a end of a pencil and press. this will curve up the shape.
Do the same thing with the black card and the may flower Fiskars punch.
Place a glue dot and attach the black part to the yellow part to make the middle of your poppy.
Take another glue dot and glue the centre of your poppy to the petals.
You now have your poppy.
You could add leaves and even wire to make them for a vase but i have used mine for a pressy.
Tips to remember- you do not have to make them a specific size. if you want them bigger, you can use your shape express template and make really big ones and for the centre you can cut circles and then take your scissors and snip around the circle to create the same stamen like the Bling punch did.


No comments:
Post a Comment